Have you ever seen something on social media, thought the picture explained it all, so you attempted to make it without actually reading the post??? Yeah, that’s caused me quite a few messes.
Well, this activity is similar. After I made it, I tried to find a post to link back to, but all the other window cling posts I had seen use many ingredients. I only used one and it turned out really well!
This post contains affiliate links for your convenience. Read our full disclosure policy here.
Supplies:
Sheet Protectors (Glossy) , or you could try a ziplock bag or produce bag.
Artistic Talent or a Clip Art Image of a Christmas Tree
Instructions:
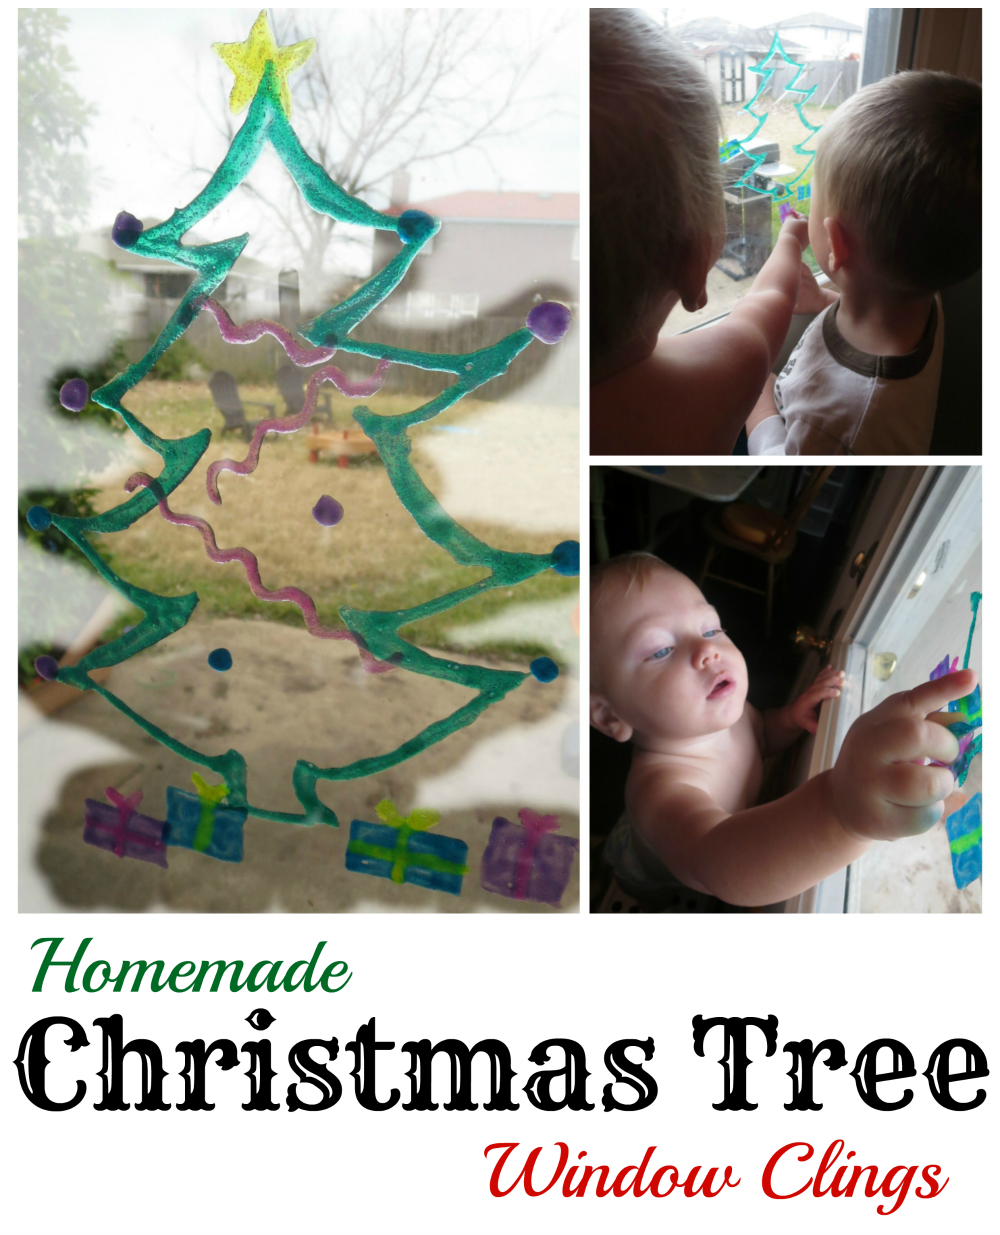
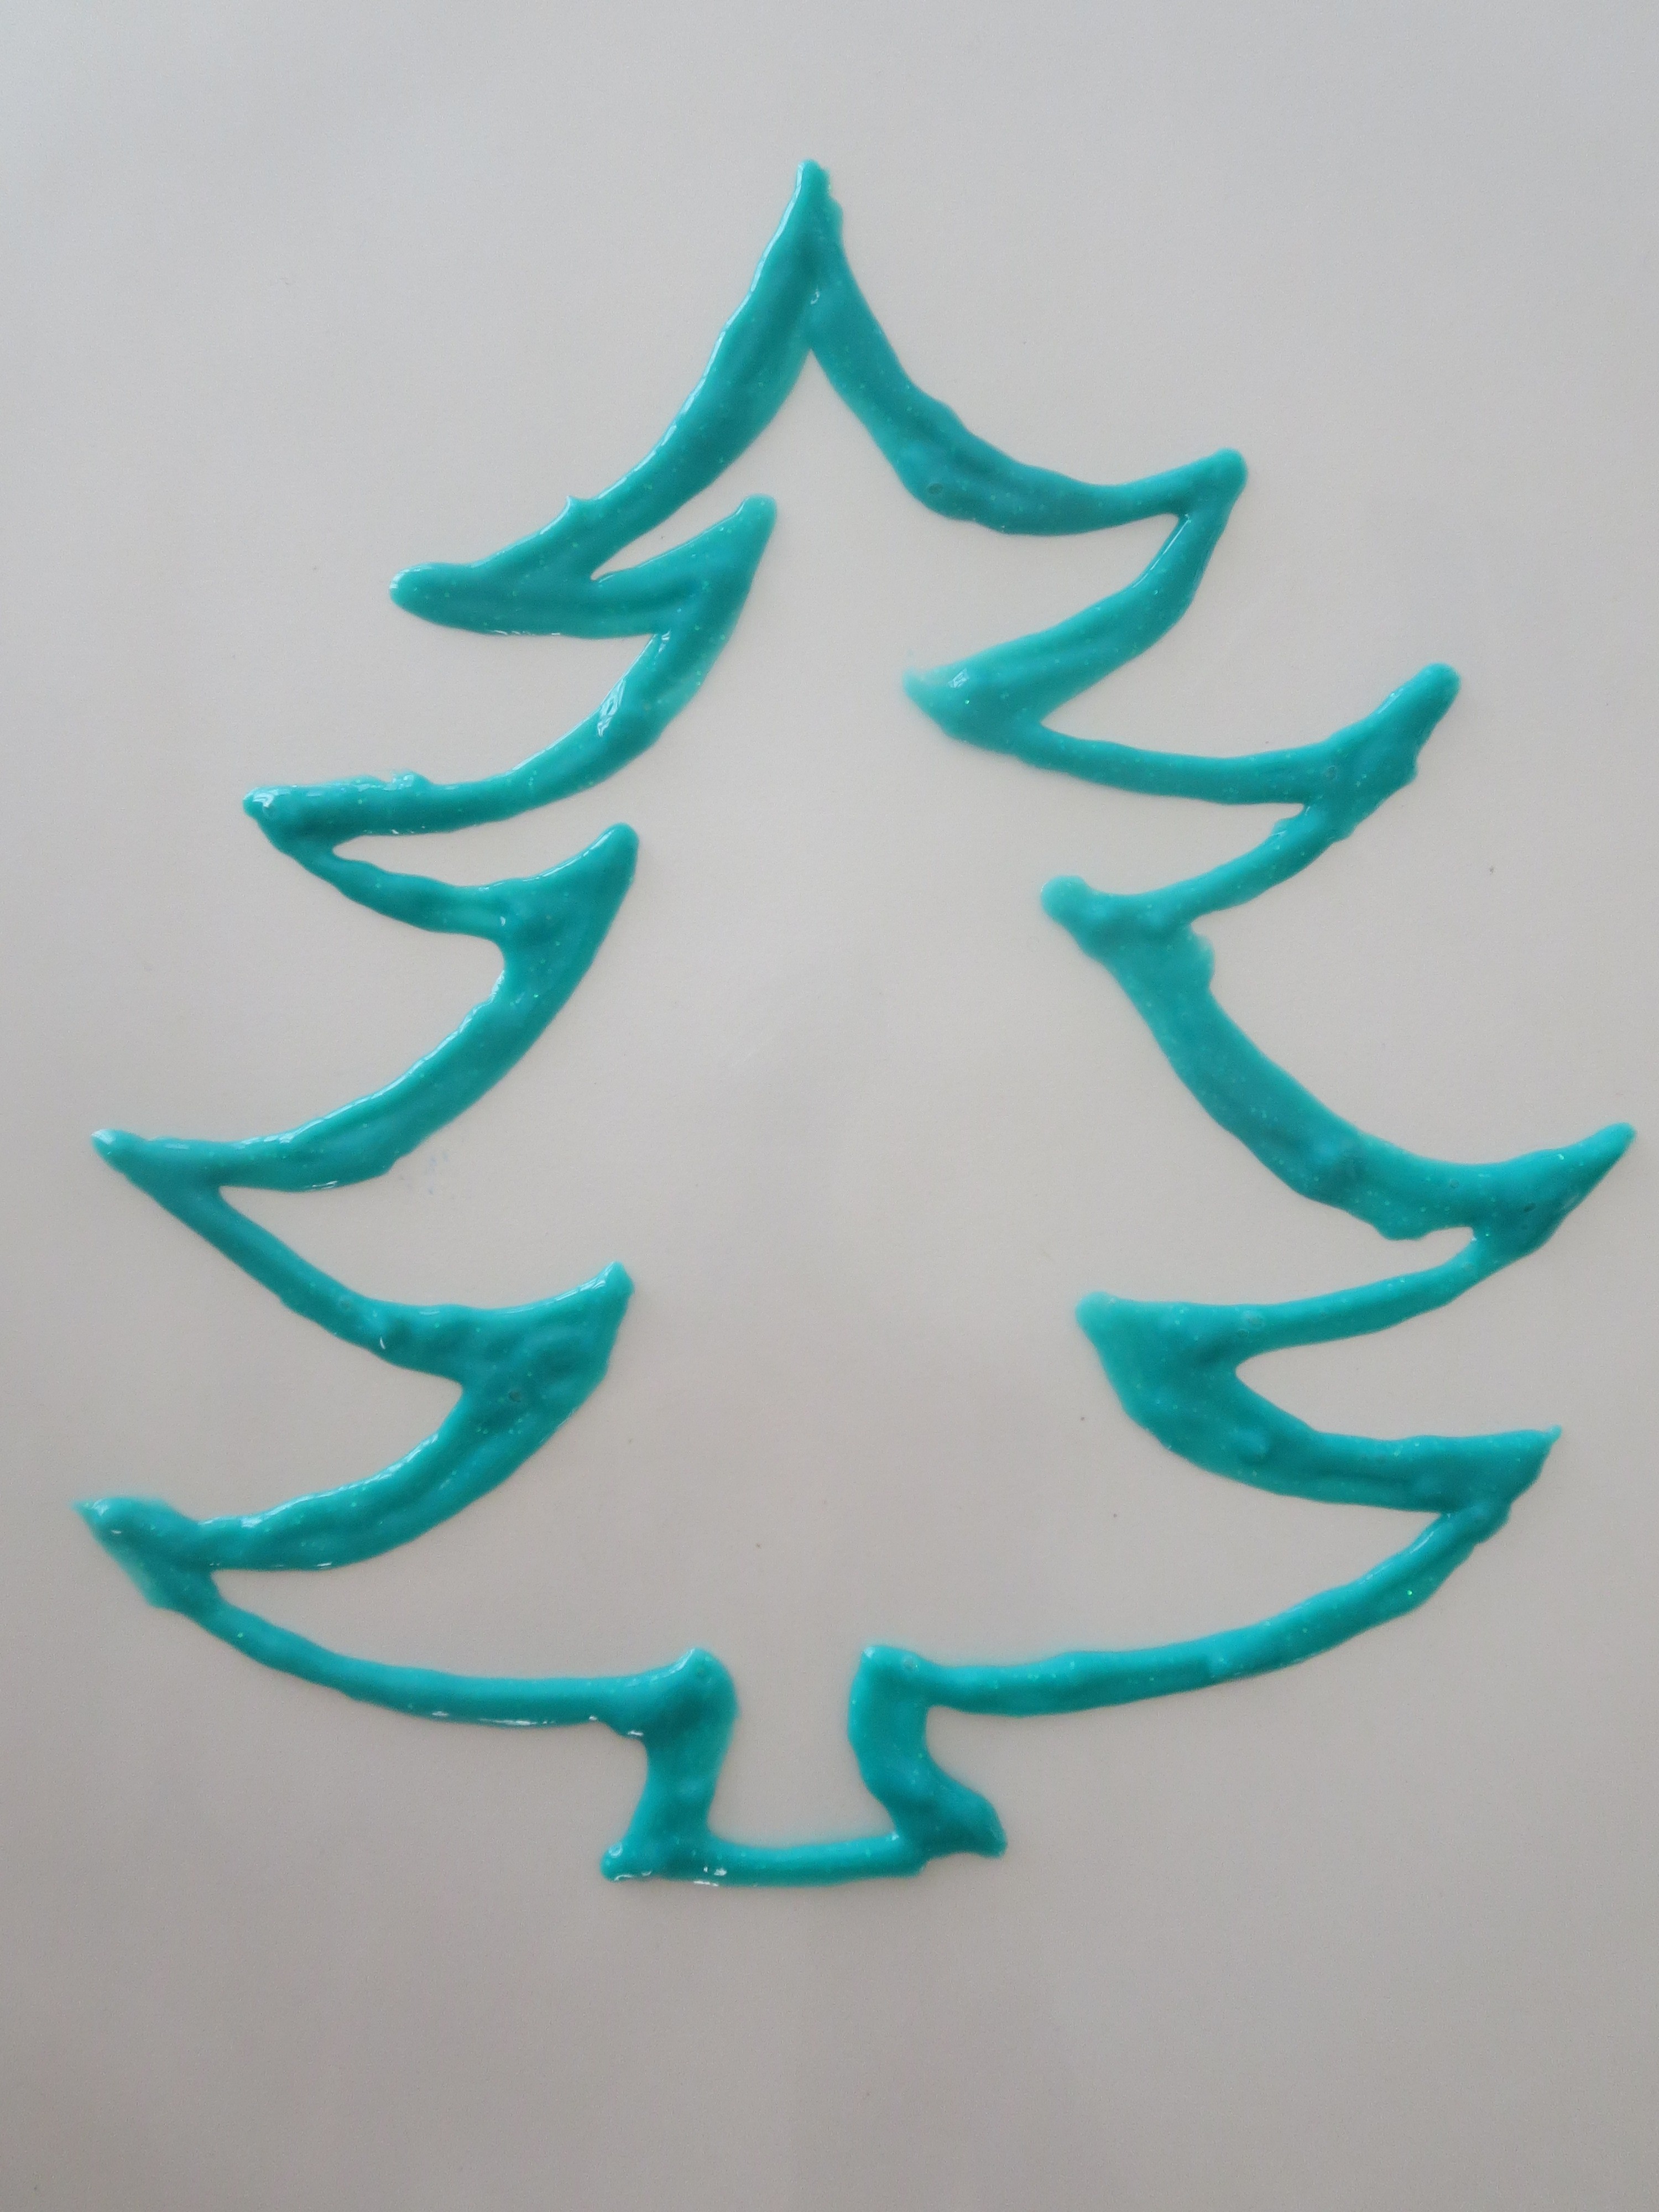
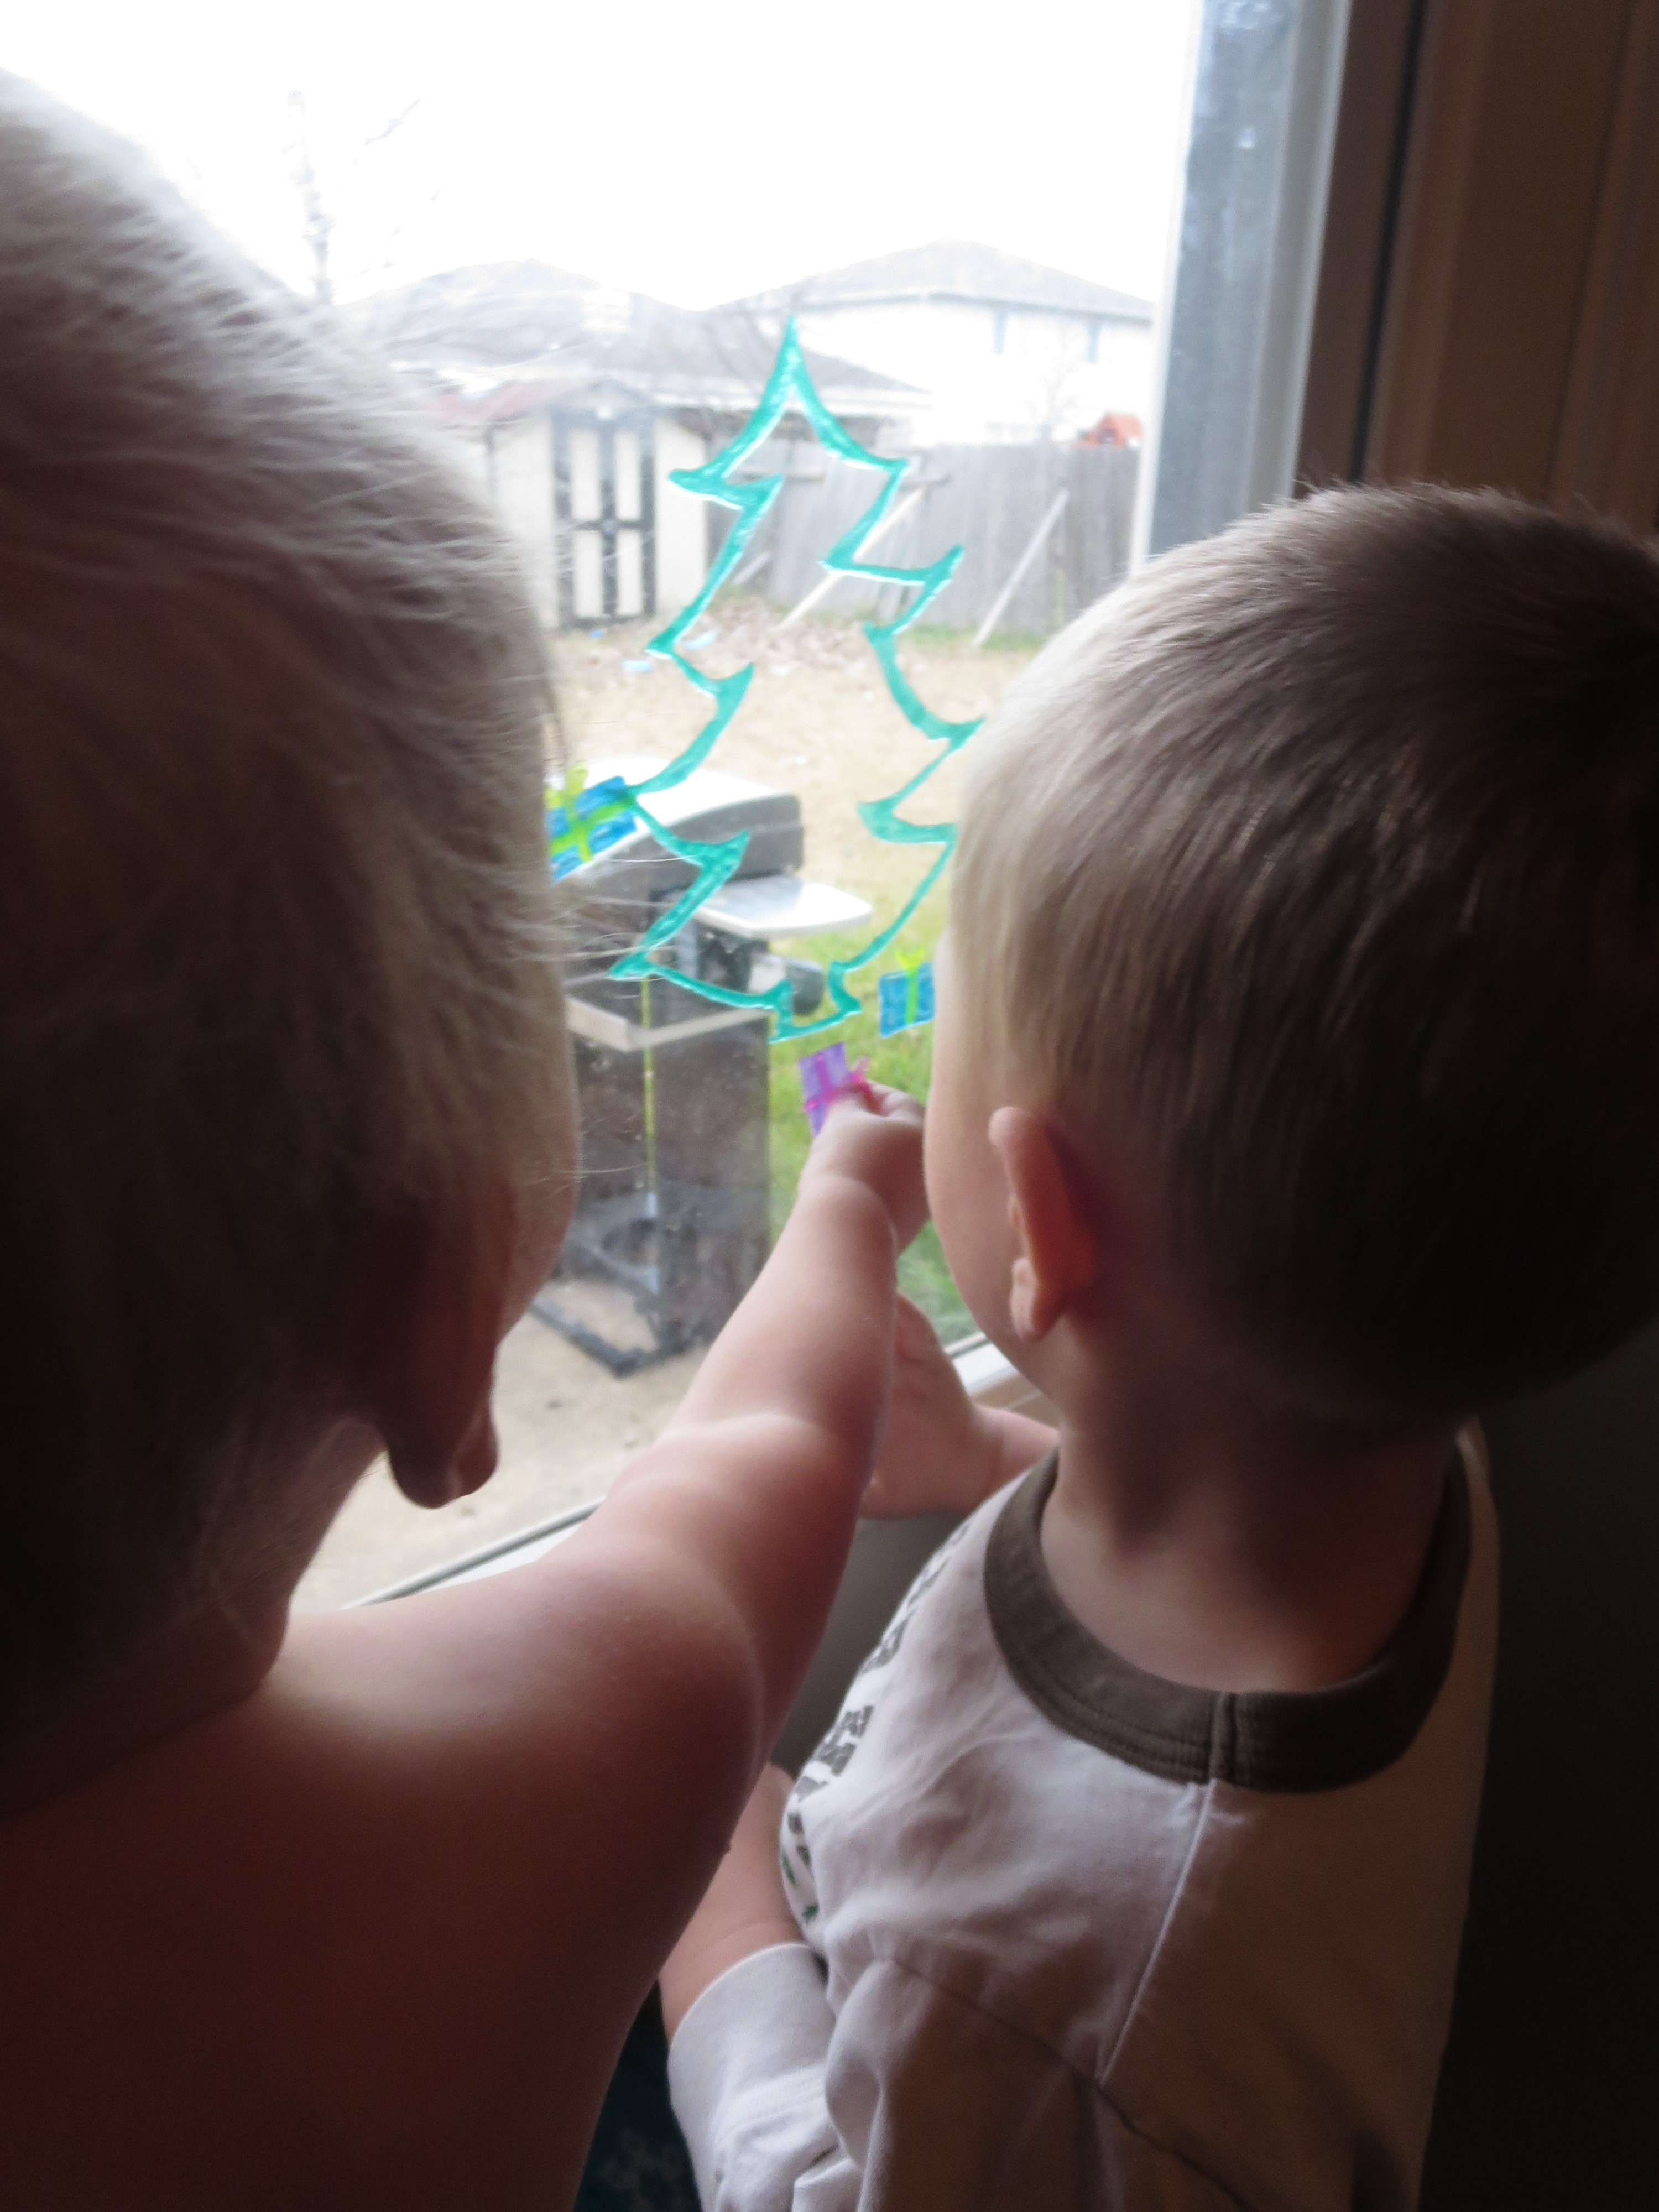
- Print out (or draw) a large, simple, thick Christmas Tree and place it within the sheet protector.
- Trace the image with fabric paint on top of the sheet. Make sure the lines are thick or they will surely be ripped and stretched by little fingers.

- Make ornaments, garland, gifts and a star.
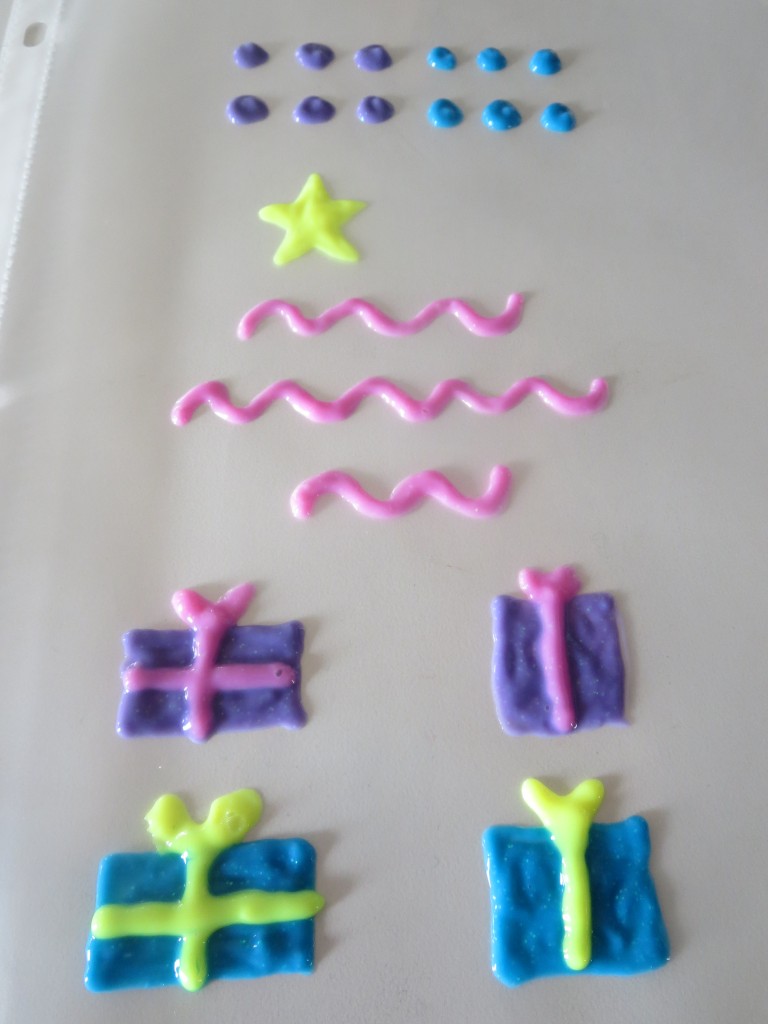
- Let dry overnight. The color will be darker, be sure it’s thoroughly dry.
- Carefully peel off the sheet protectors and stick it to a window.
- PLAY!

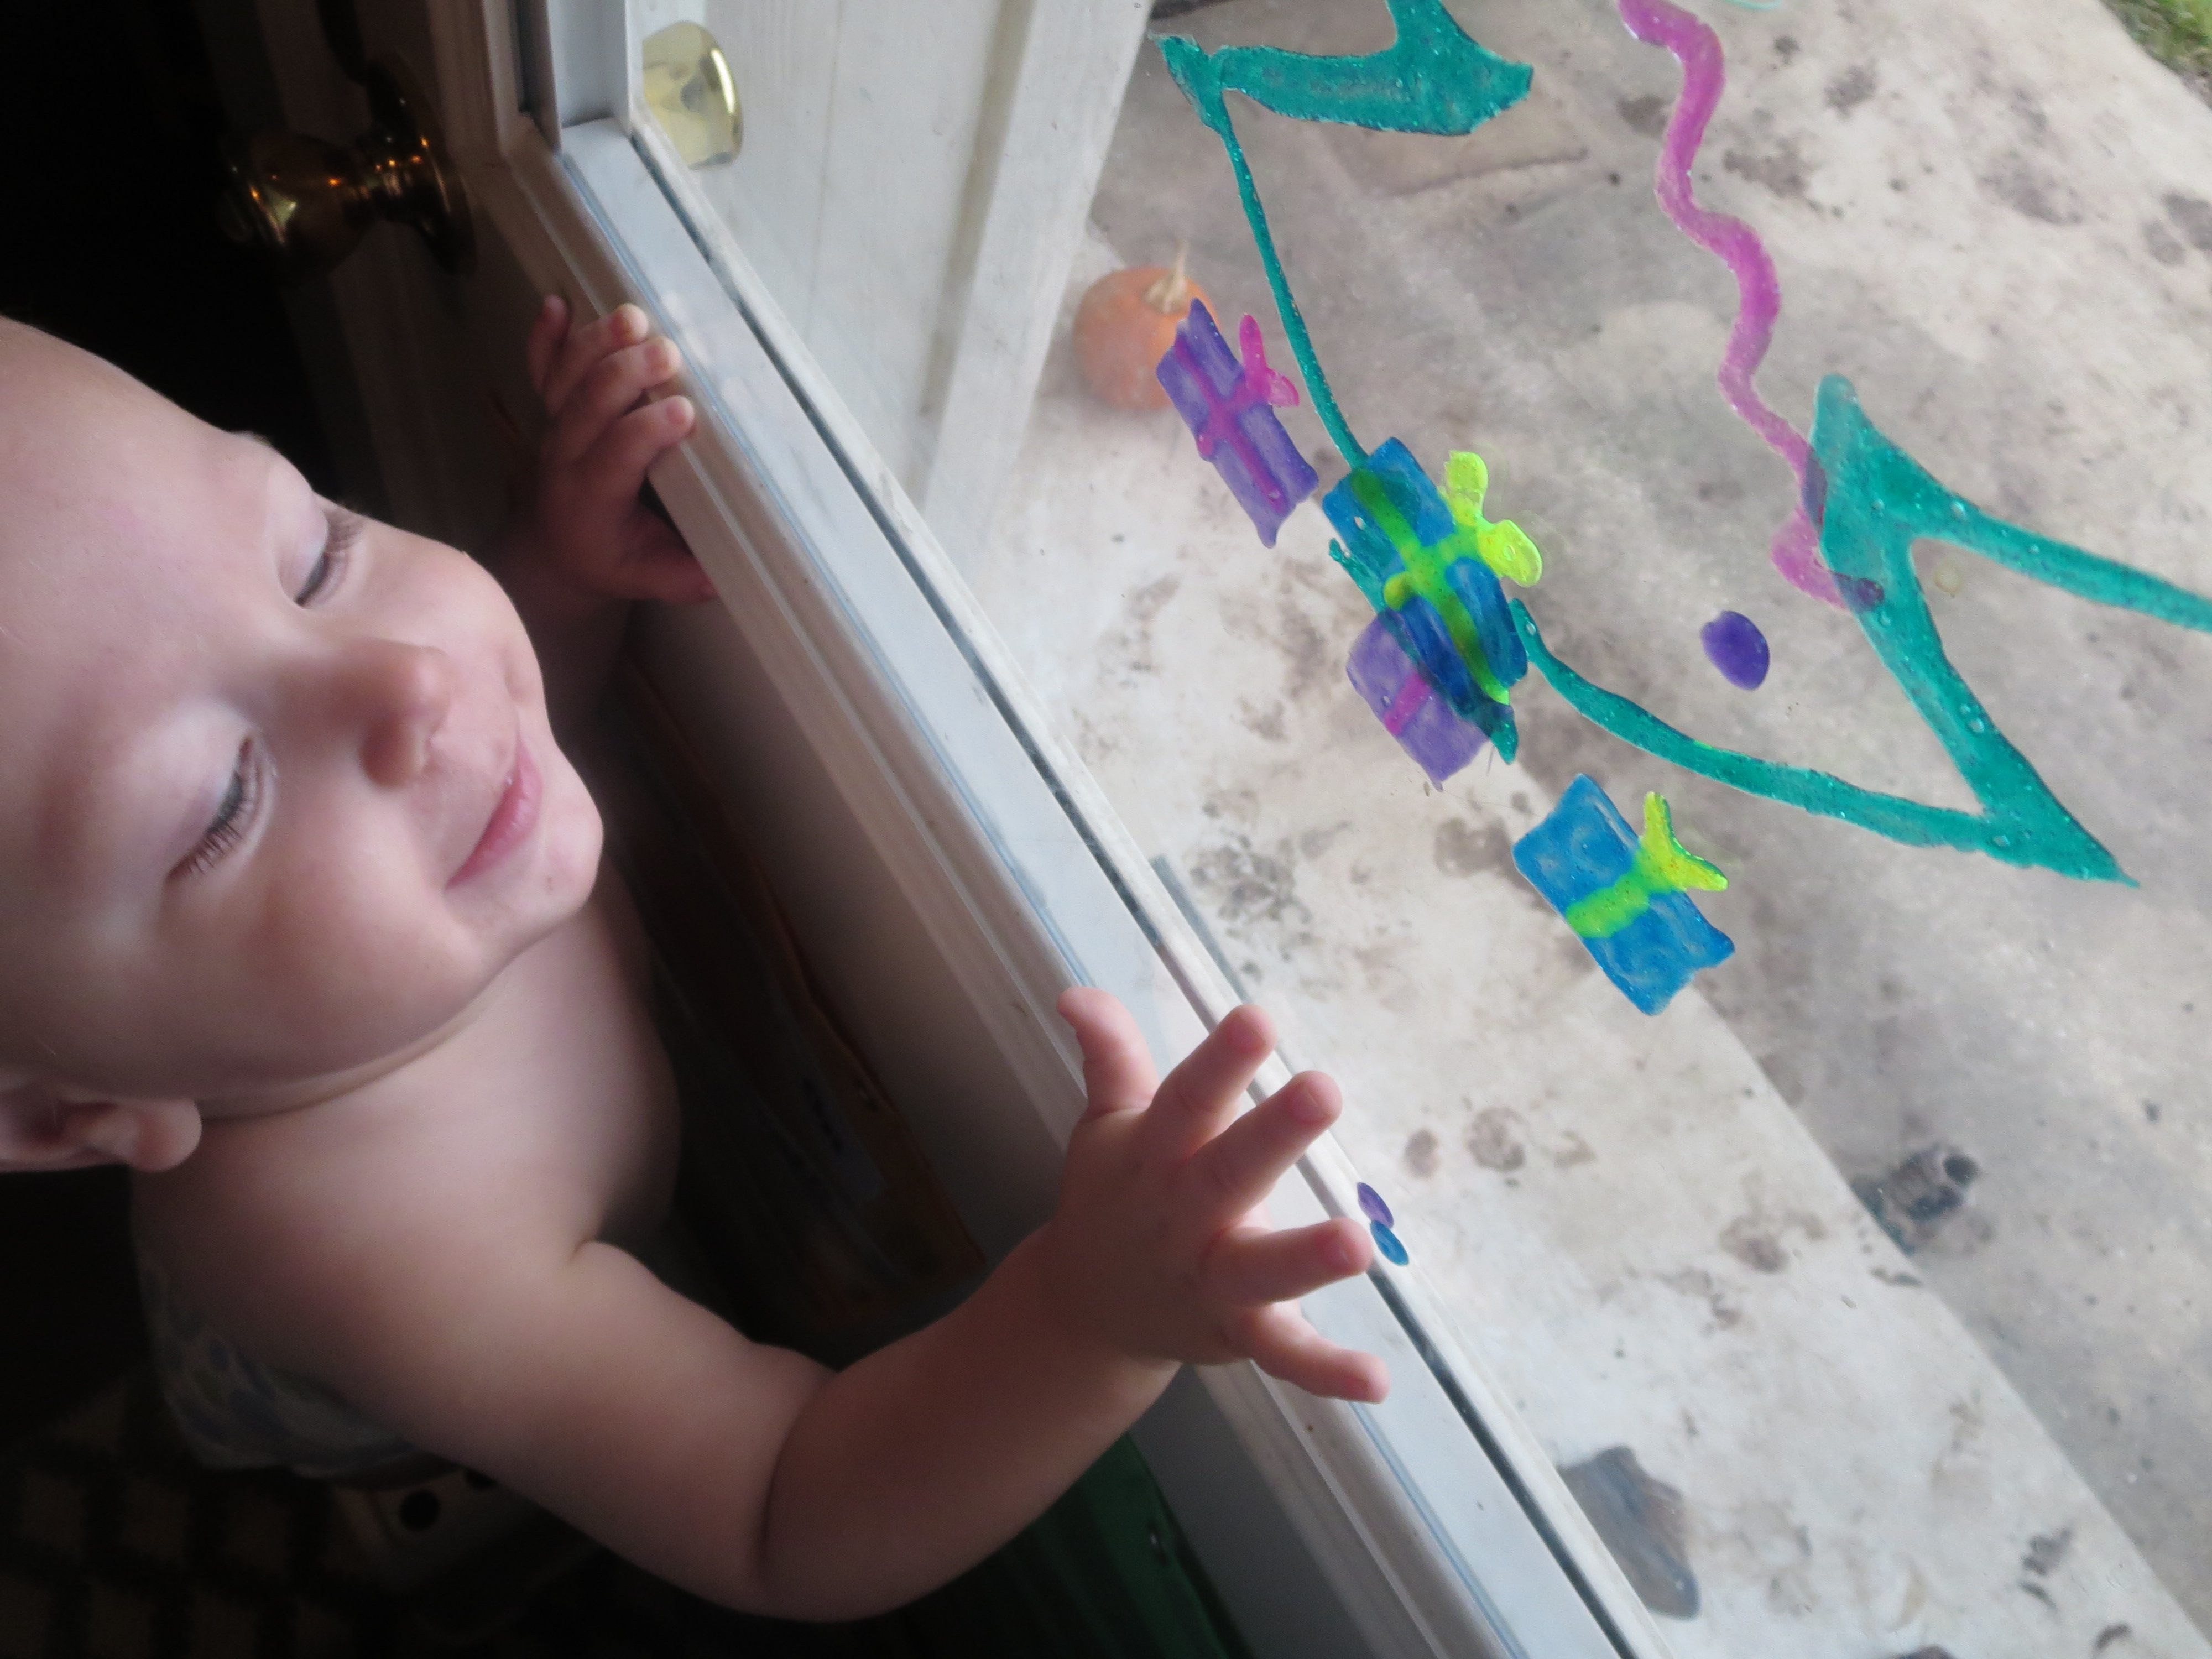
This was such good fine motor practice for the boys! I was totally impressed when little Lumpy (19 months) was able to manipulate the gifts and ornaments, even peeling them off the window and rearranging.
Placing the star on the top!

They even played together for a few minutes… A Christmas miracle!
This was ridiculously easy! I can’t wait to make more homemade window clings for all the holidays and seasons!!!
Merry Christmas ALL!
Enjoy simple, playful learning activities? Sign up and you won’t miss a post!

Julie is a frazzled mom of three tornadoes. As a dorky second-generation homeschooler, she writes about learning and play, natural living, special needs parenting and matters of the heart. She serves an astounding God that radically saved her.
Follow My Mundane and Miraculous Life through social media!


![]()
[…] […]