Have you ever wondered how to make a DIY sensory bottle? Are you curious about the benefits of sensory bottles?
Sensory bottles are popular with parents of kids with sensory processing differences for good reason.
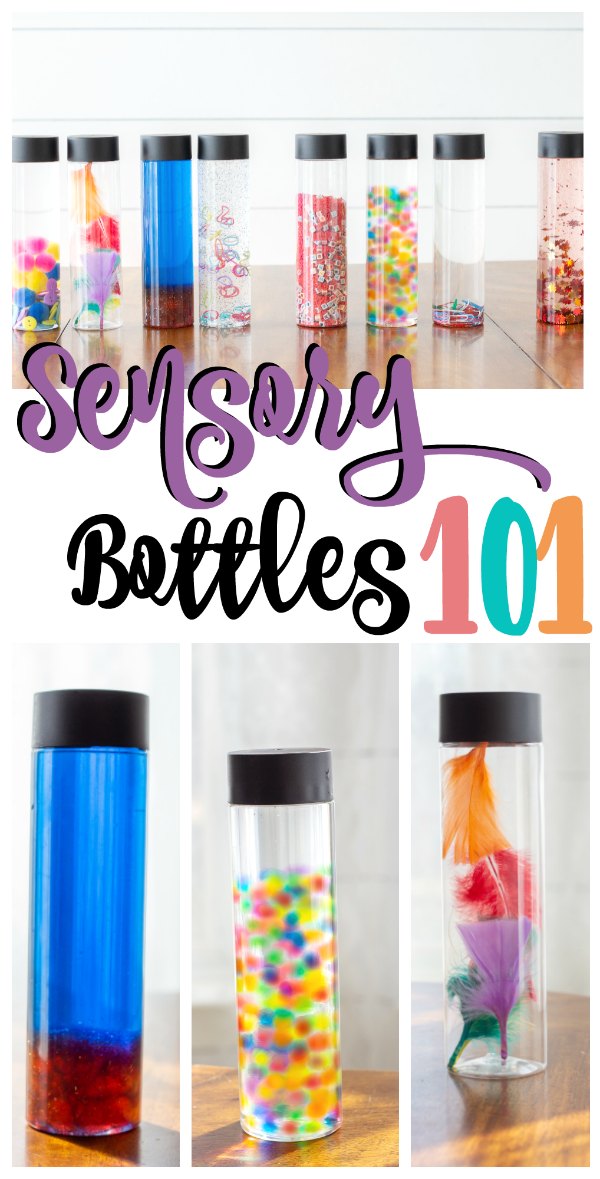
They help calm the senses and avoid meltdowns while still being inexpensive and easy to make!
This post contains affiliate links for your convenience. Please read my full disclosure HERE.
What are DIY Sensory Bottles Used For?
Let’s start with the WHY.
Because as much as I like to ooooh and aahhh over a lovely pinterest or instagram craft, I want to know that there’s some serious benefits and positive side effects.
The first great effect of a sensory bottle or a calming jar is the visual interest and distraction it can provide a child.
These things are seriously mesmerizing. And for a child who is having a sensory meltdown, this distraction can be like a life preserver, calming anxiety! Watching the swirling, sinking or floating objects can give a child something to focus on beyond their sensory struggles.
It also gives kids a window of time to start controlling their breathing, which is a vital part of recovering from a sensory meltdown.
Another important benefit of sensory bottles is their weight. Why? Because the weight provides proprioceptive input which is the king of the senses!
This sense is responsible for body awareness and plays a crucial role in the brain’s ability to organize and handle all other sensory input appropriately. So proprioception can help a child handle everything from unwanted auditory input, to picky eating, to aggression!
Proprioception helps the whole body regulate, and that’s exactly what you desperately need during a sensory meltdown!
P.S. If you’re wondering what is THE most effective sensory activity to prevent meltdowns with your unique child, take this quick, free, informative quiz. I created it to help you get started in the right direction!
When and Where Should You Use a Sensory Bottle?
Calm Down Bins
DIY Sensory Bottles are great for managing anxiety. Because sensory bottles can help kids regain control during a meltdown, it makes sense that you’ll want to have one in your calm down bin, or in your calm down area.
Transition Countdowns
Glitter glue sensory bottles are great for helping a child visually understand a transition is coming up. Shake up the bottle, put it on the table where you want the kids to gather, and invite them to be seated before all the contents settle down.
Being able to see when a transition is going to occur can actually assist in preventing meltdowns. (Hint: Let the child do the shaking!)

Dance Accessories
Dancing is great for the sensory system because all the movement provides vestibular input as well as proprioception. Adding these whimsical sensory bottles can extend the toddler dance party or entice reluctant dancers to join you for some sensory play!
Open Ended Play
Whether they build pyramids with them or turn them into light sabers, kids imaginations will go wild over sensory bottles or calm down jars!
How Do You Make Sensory Bottles?
If you’ve ever wondered how do you make calm down sensory bottles, you’re going to be pleasantly surprised and how easy it is!
- Get a Plastic Bottle
- Fill It with Something Fun
- Seal the Lid Shut
- Shake!
Honestly, the possibilities are endless! They’re a great DIY sensory toy, and I simply raided our craft closet for materials.
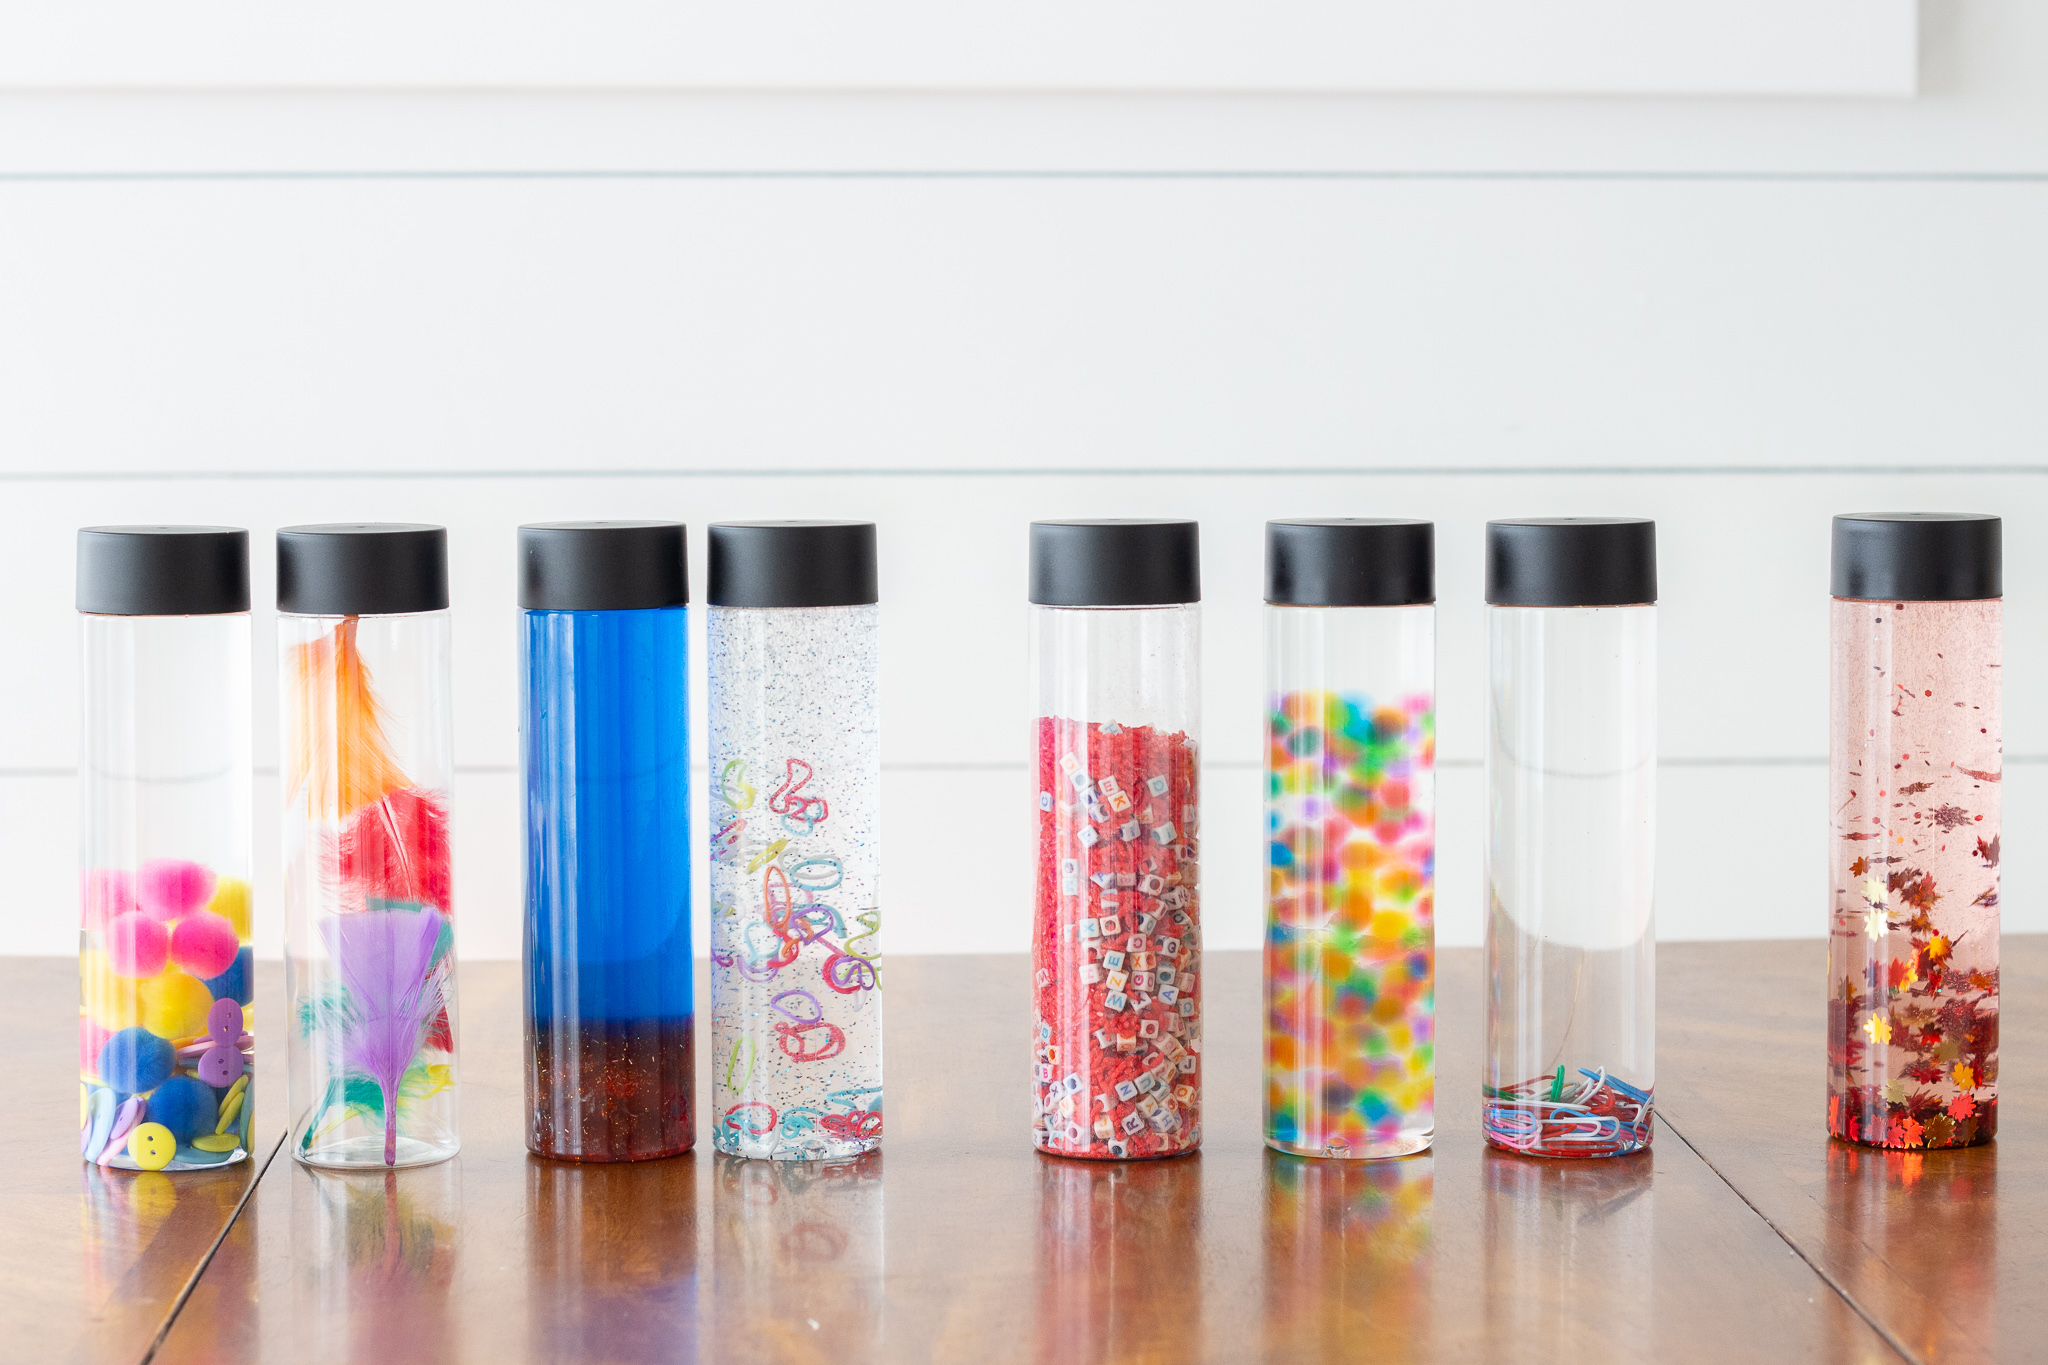
First, you’ll need the bottle! While you can certainly upcycle any empty water bottle you have on hand, you’ll want them to be quite clear and I’d strongly suggest a plastic water bottle, unless you’re giving the bottle to a teenager or someone who is extremely unlikely to drop it. (Nobody needs broken glass during a sensory meltdown! Eek!)
These are the bottles I got that were super affordable and worked perfectly! Definitely strong enough to be man-handled and crystal clear.
Fillers for DIY Sensory Bottles
For most bottles, the next step is to pick a liquid filler. For the most part, I just used water, because that’s what I had. If you’re wanting to have two separately colored liquids, I’ve been advised to use drops of food coloring for the water, but to use either corn syrup, glycerin, or baby oil as the other liquid and color that second choice with an Oil/Gel-Based Candy Colorant.
Now, add something fun and small inside the liquid!Here’s where your creativity and your child’s interests can really shine!
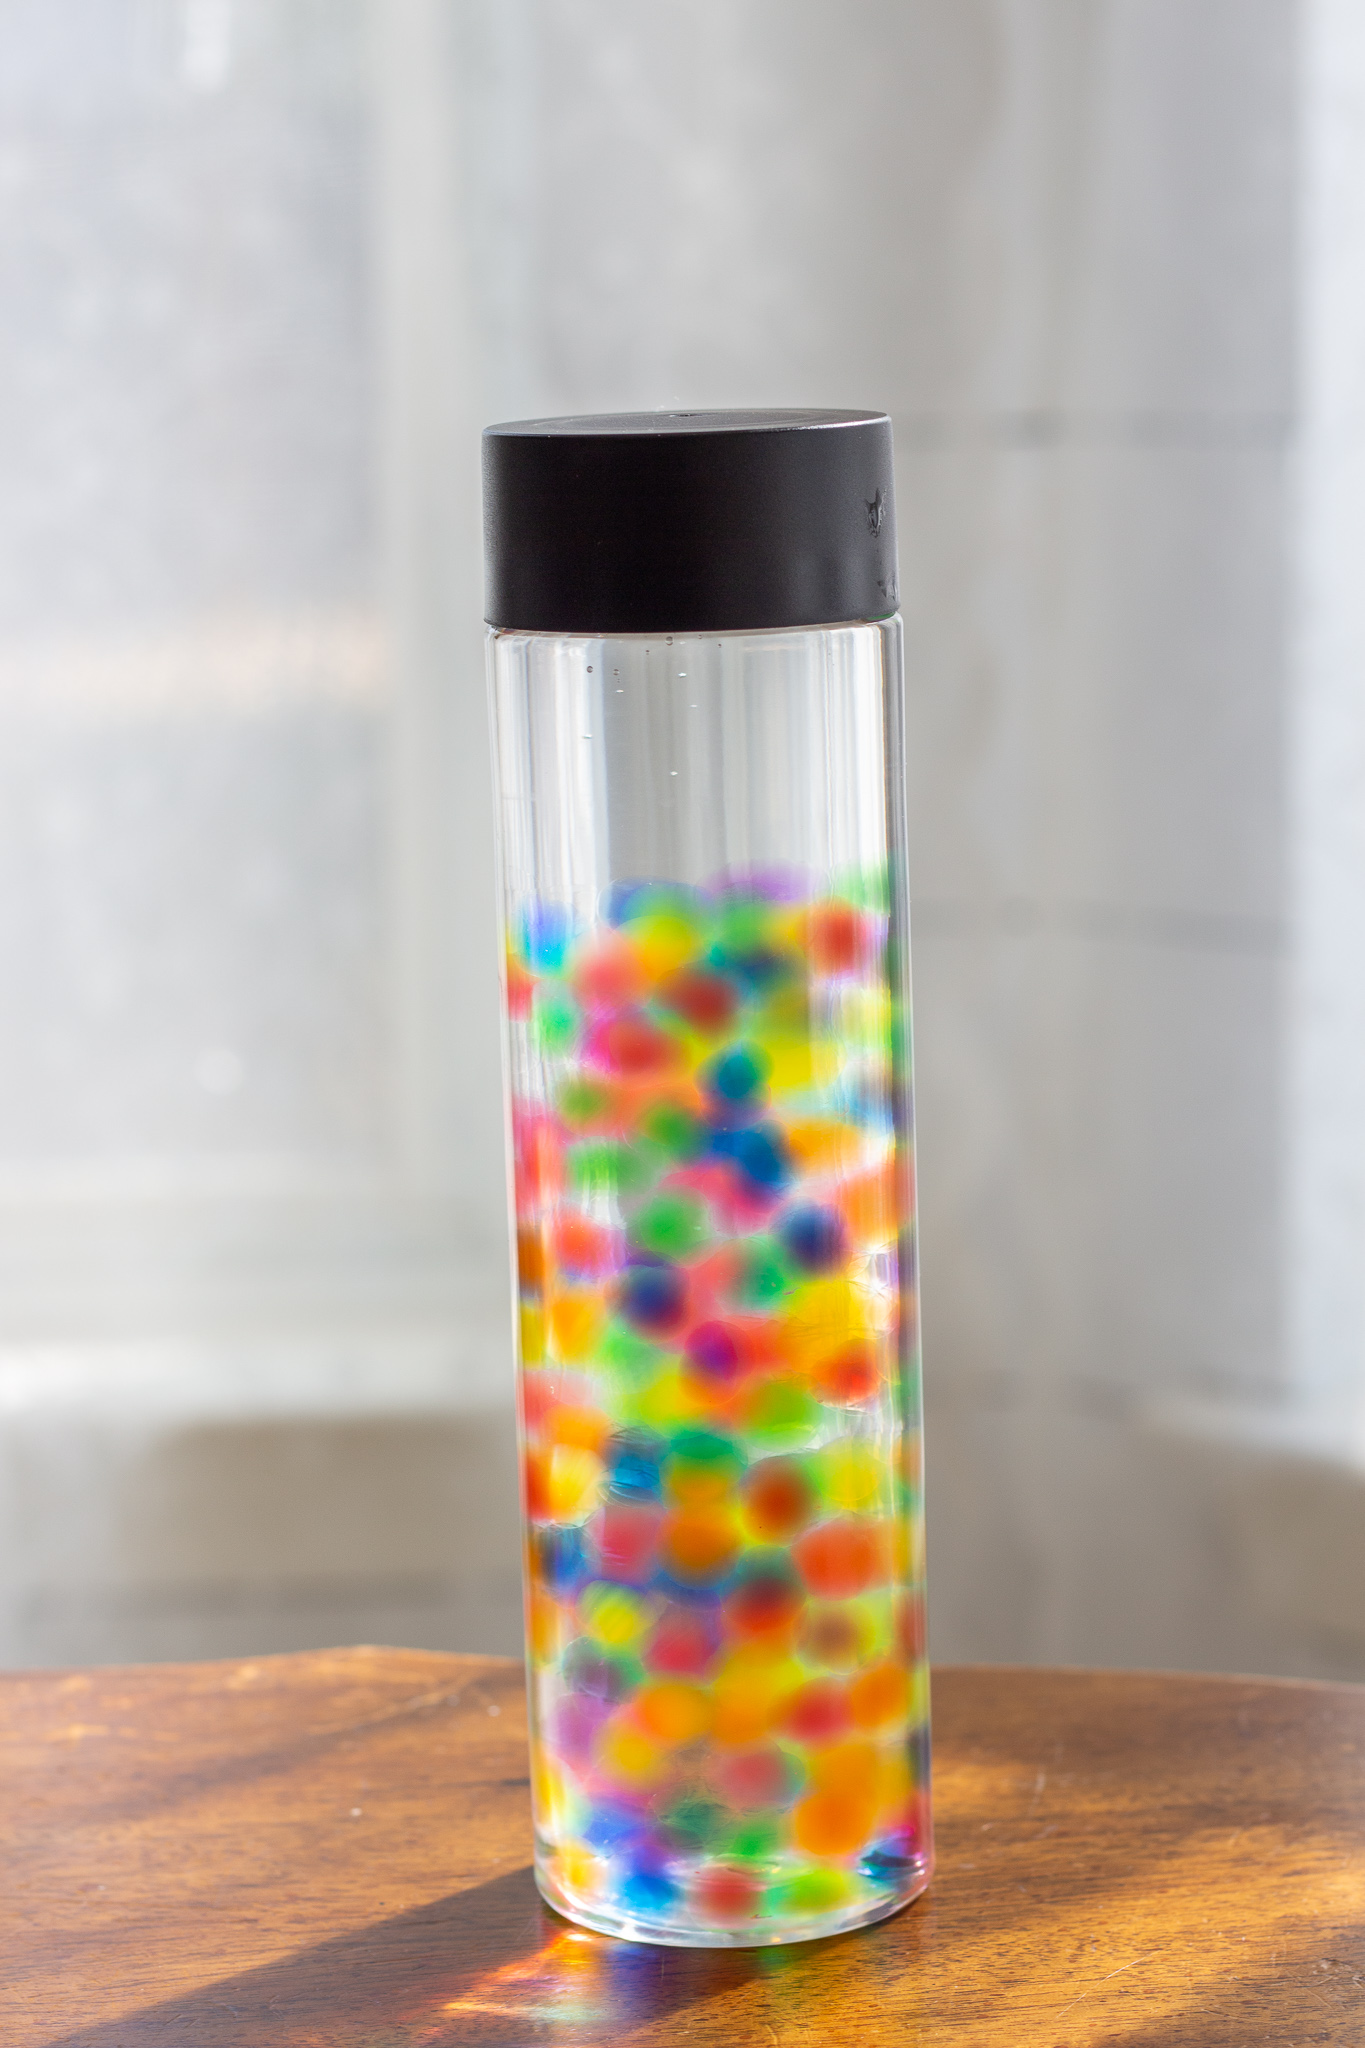
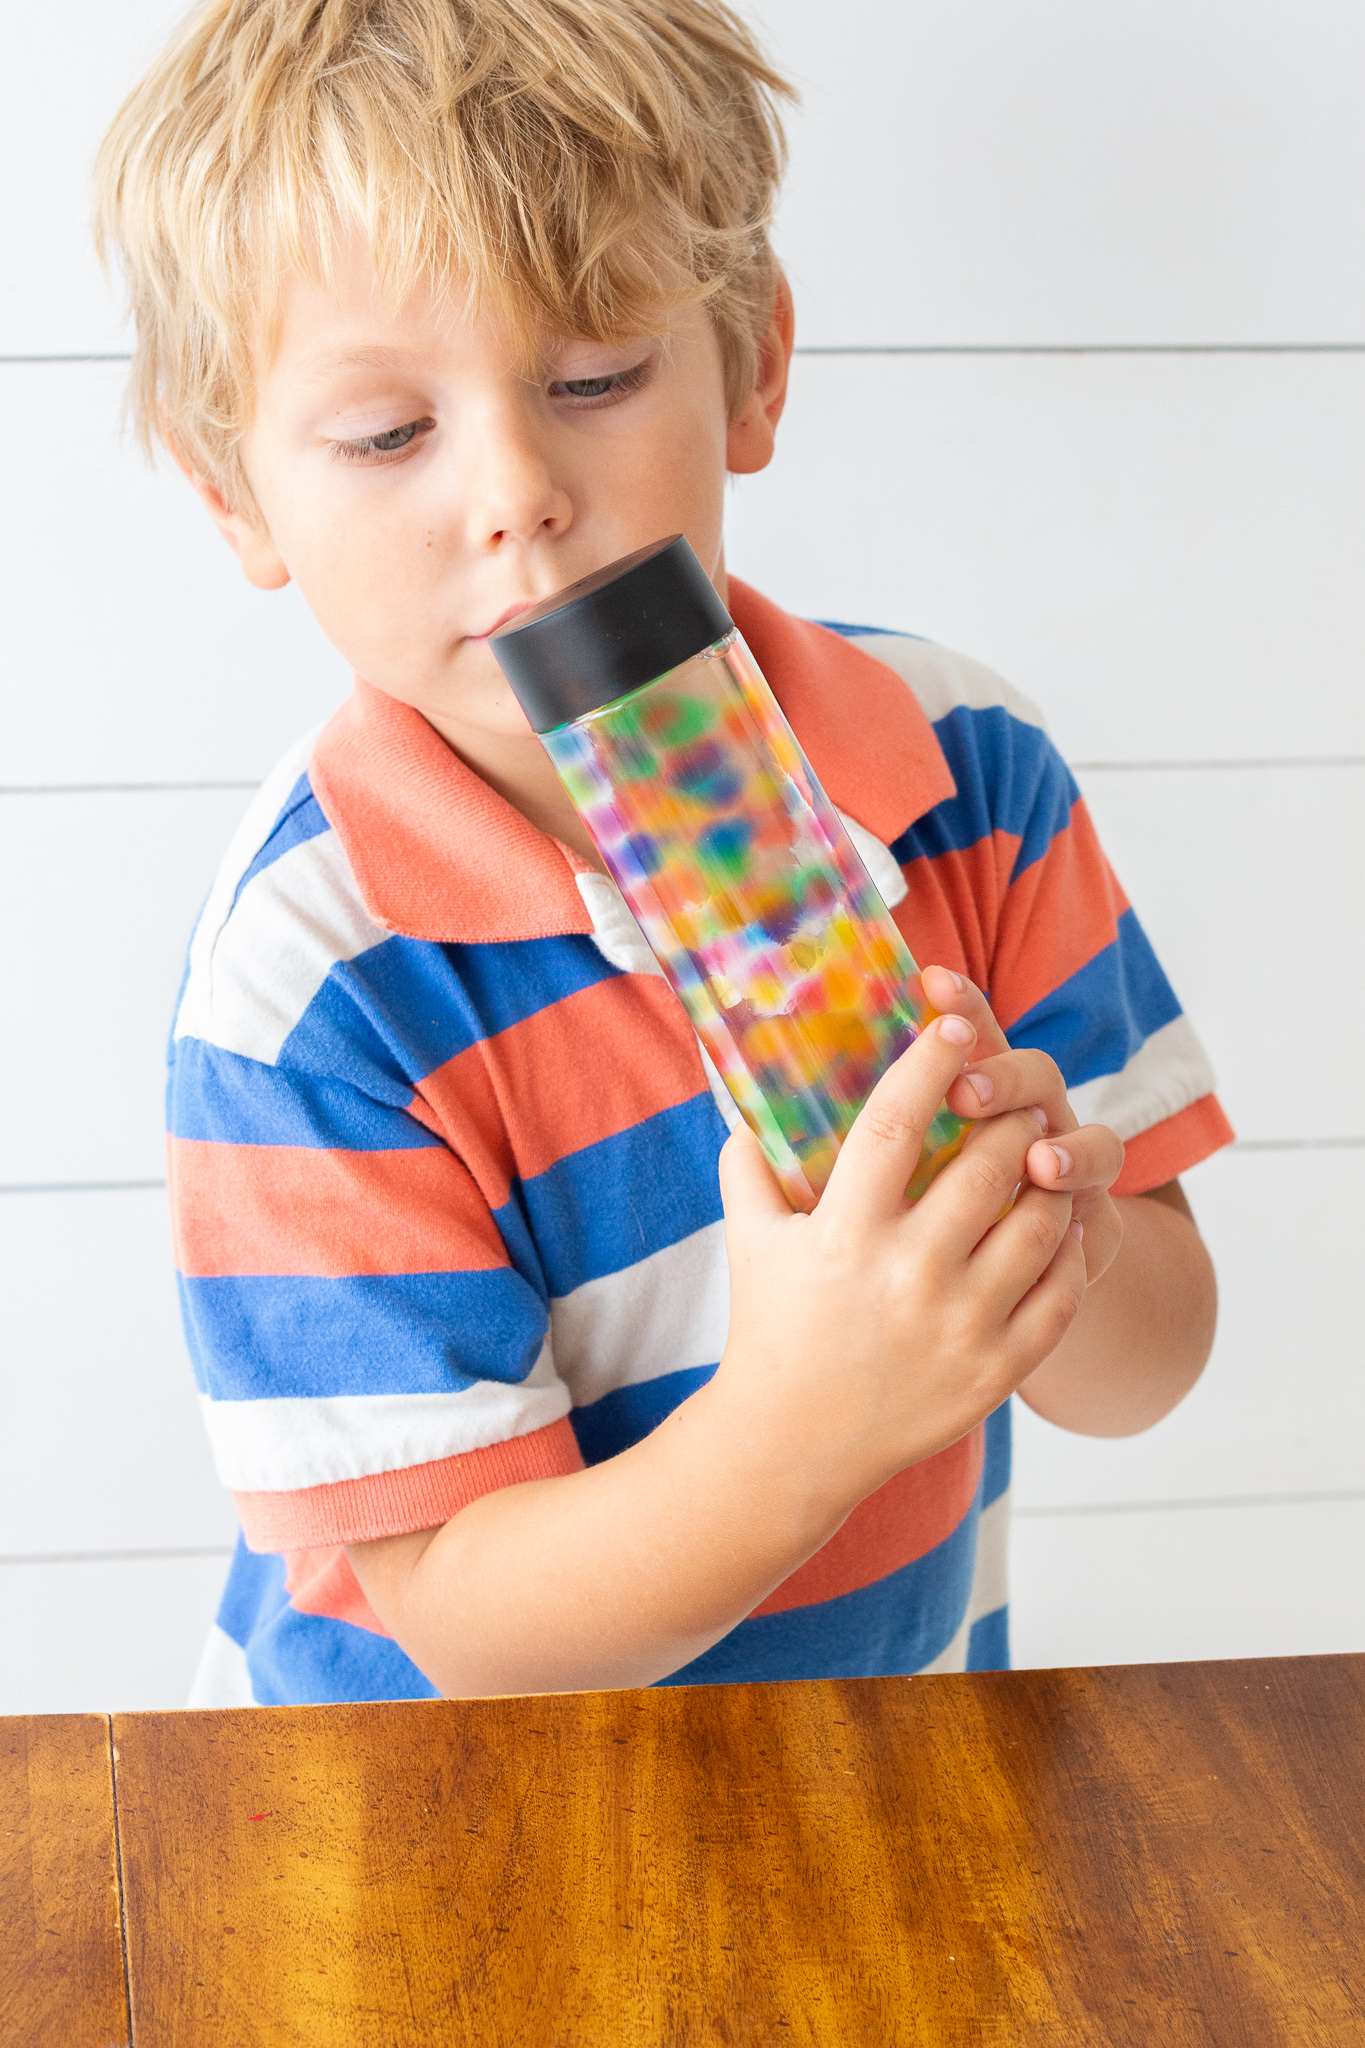
We made a bottle simply with Water Beads and water! This one gave a gorgeous swirl!
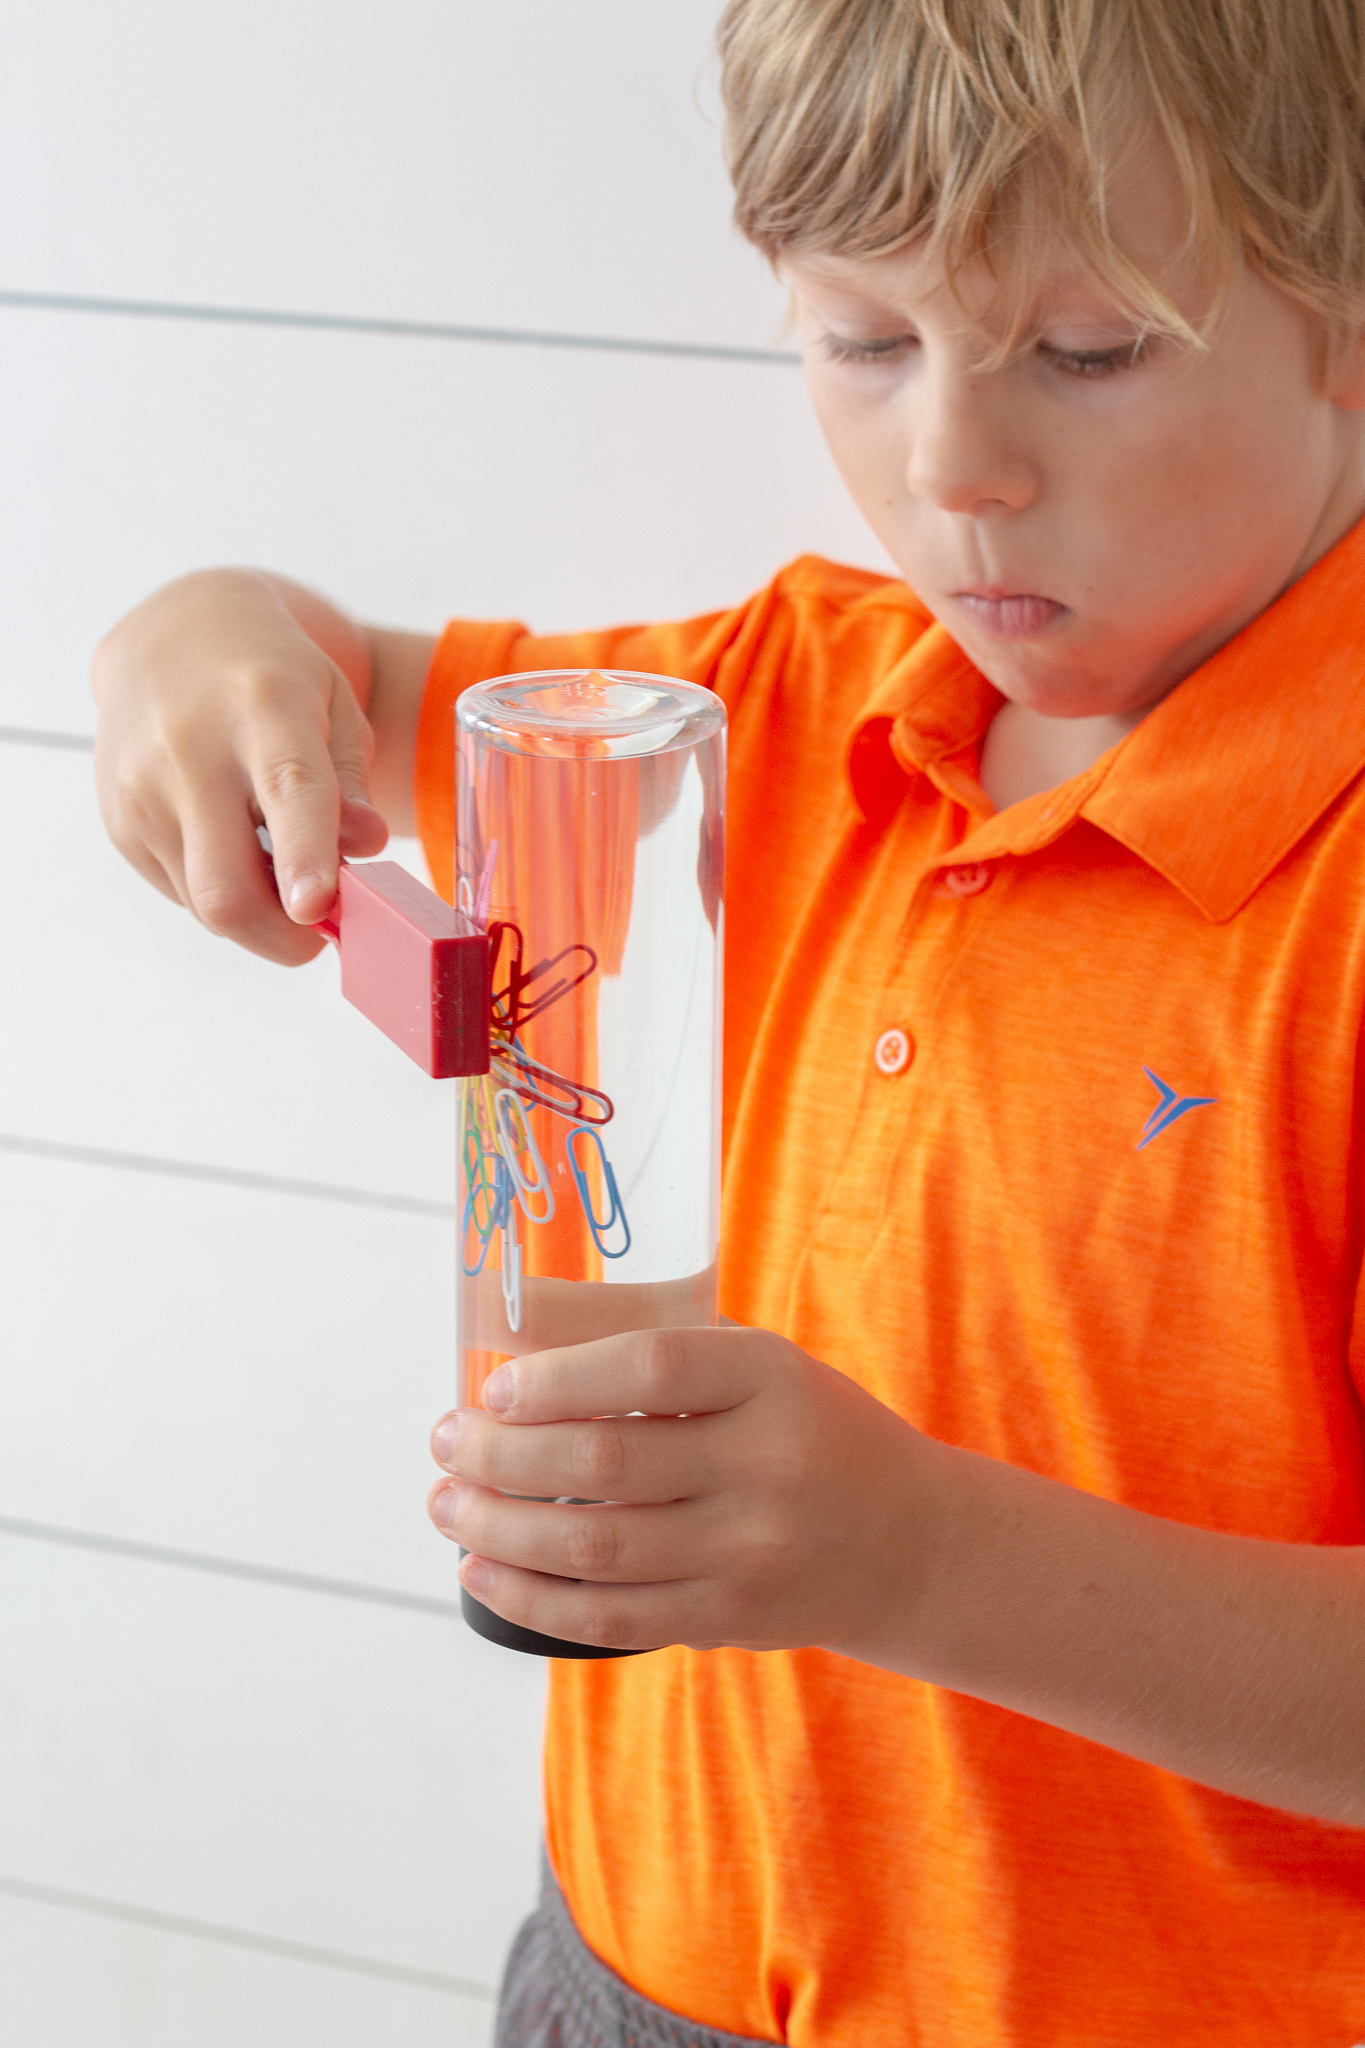
Here’s one with paper clips and water. Simply drag a magnet on the outside to keep kids fascinated!
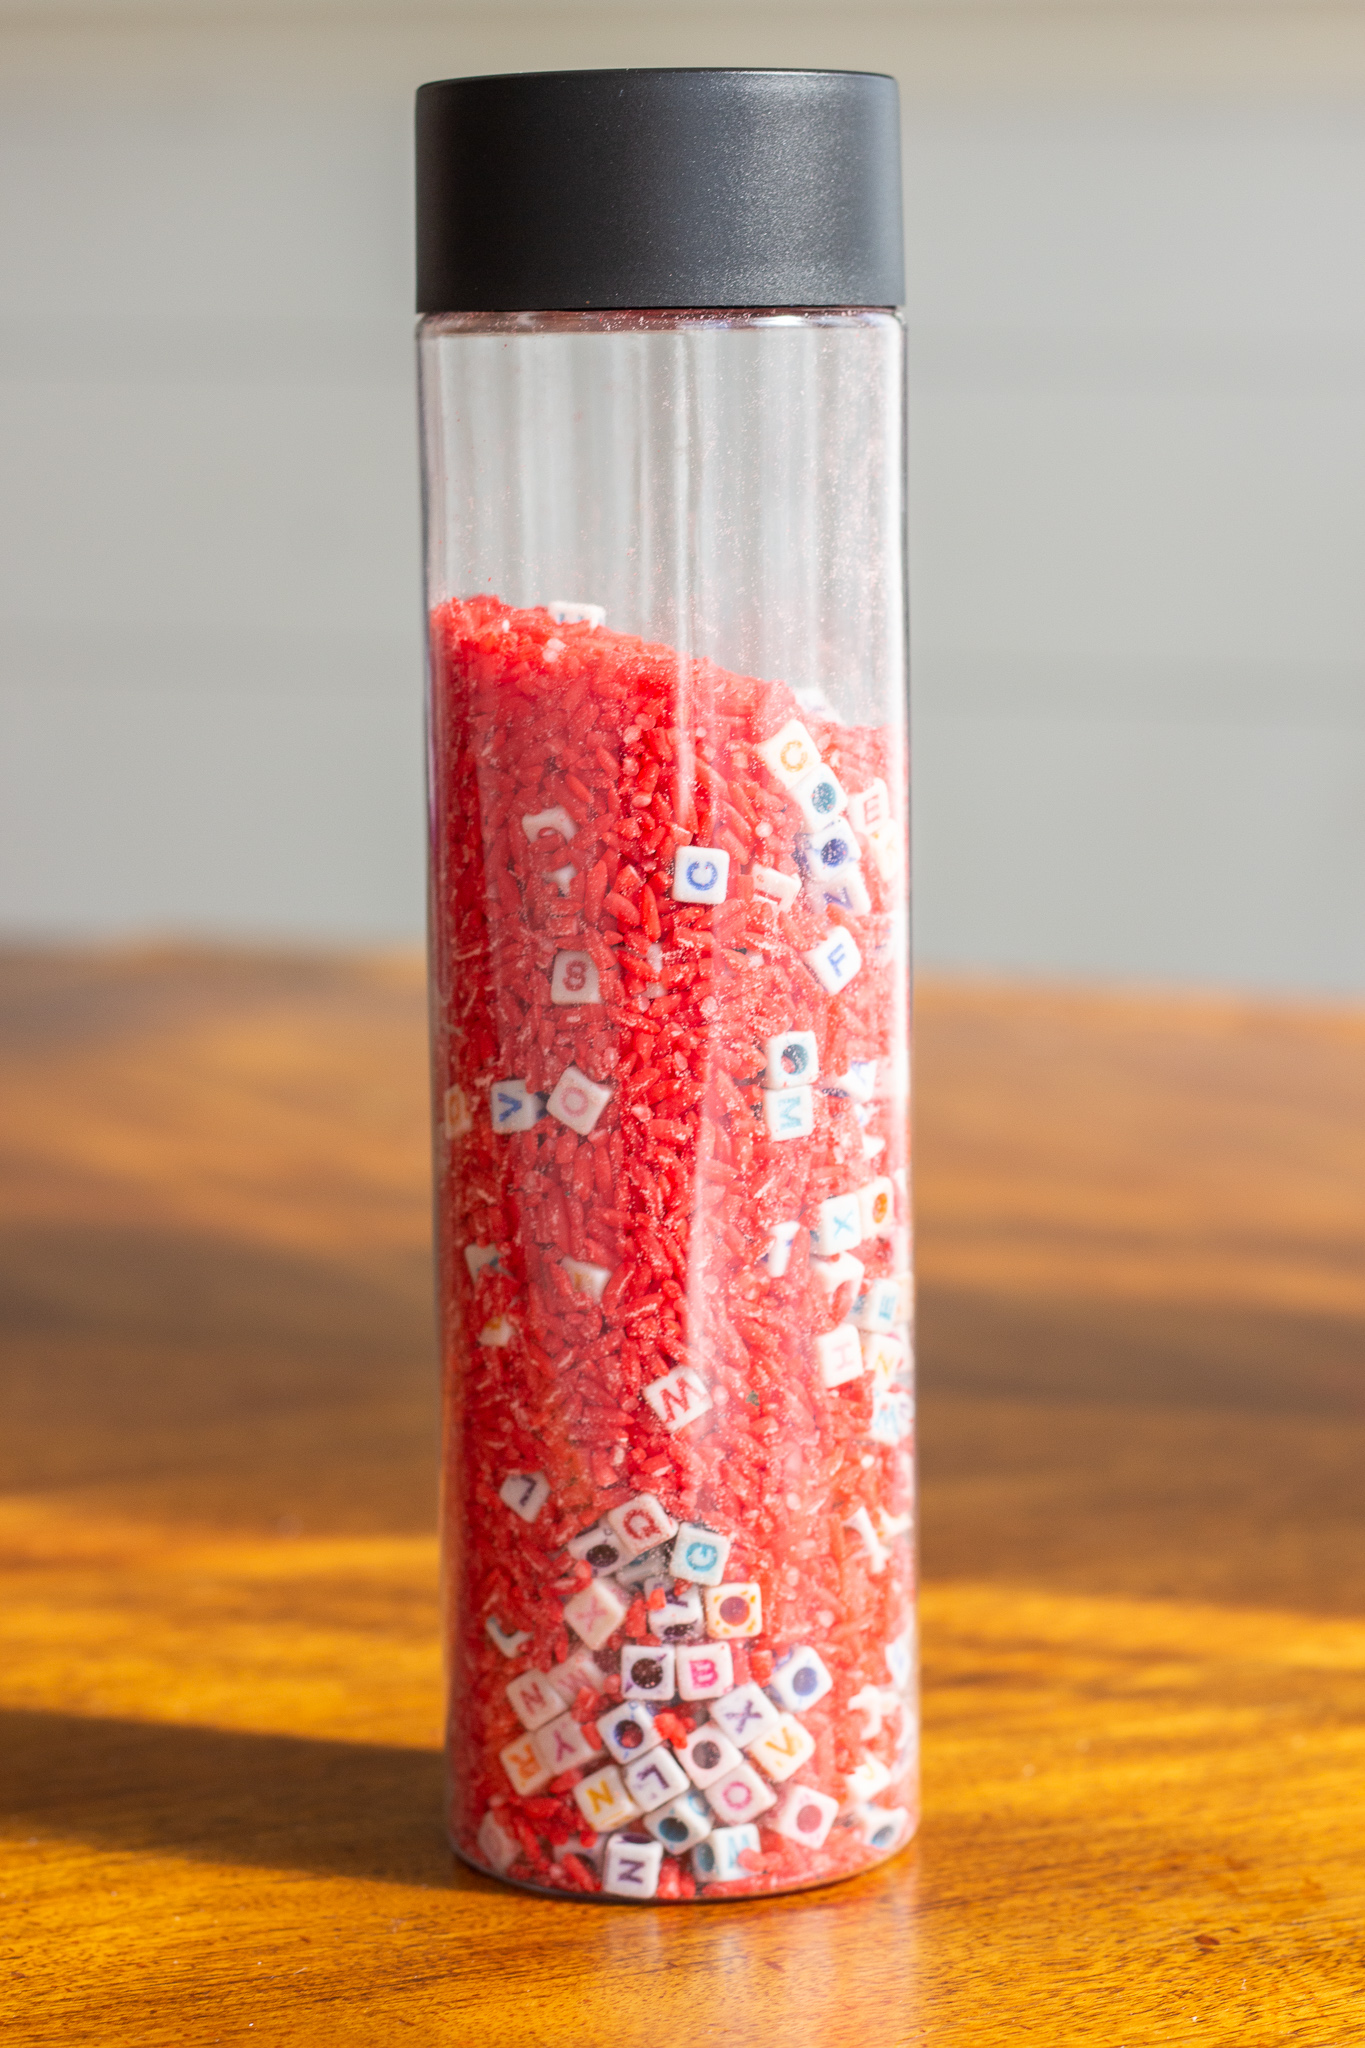
You don’t even have to use liquid on the inside! For this one we used colored rice and letter beads to create a fun word hunt!
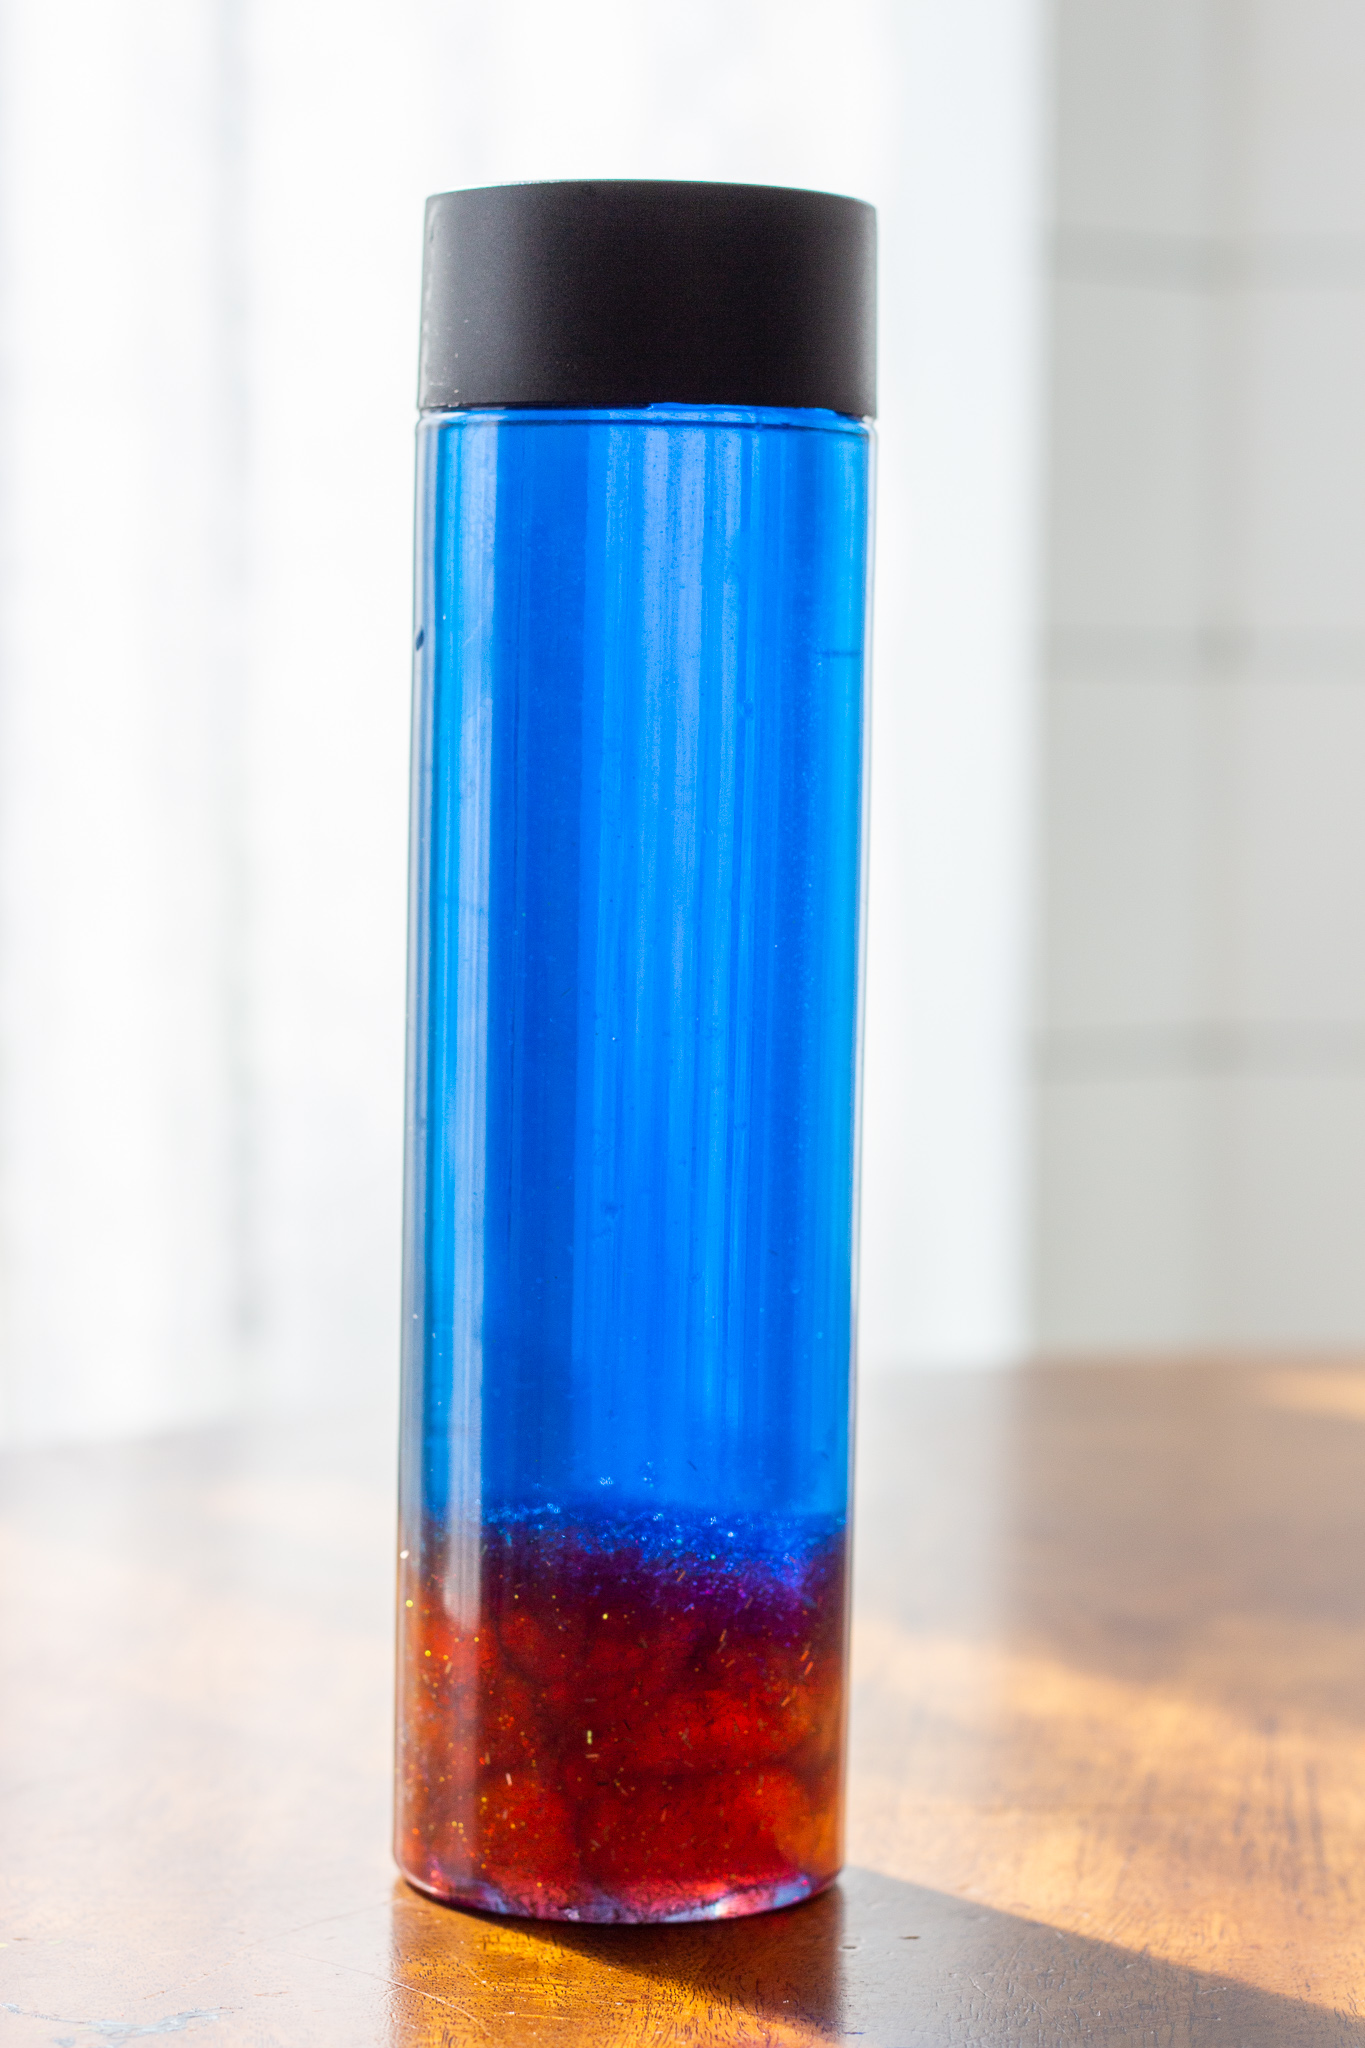
If you want to make a glitter bottle, you could use glitter glue and food coloring like we did with this one. Pictures don’t do justice to how vibrant this one can be with sun shining through it!
Legos are an easy addition to any DIY sensory bottle!
Sand would be a great filler, especially if you’re wanting to add some calming proprioceptive weight.
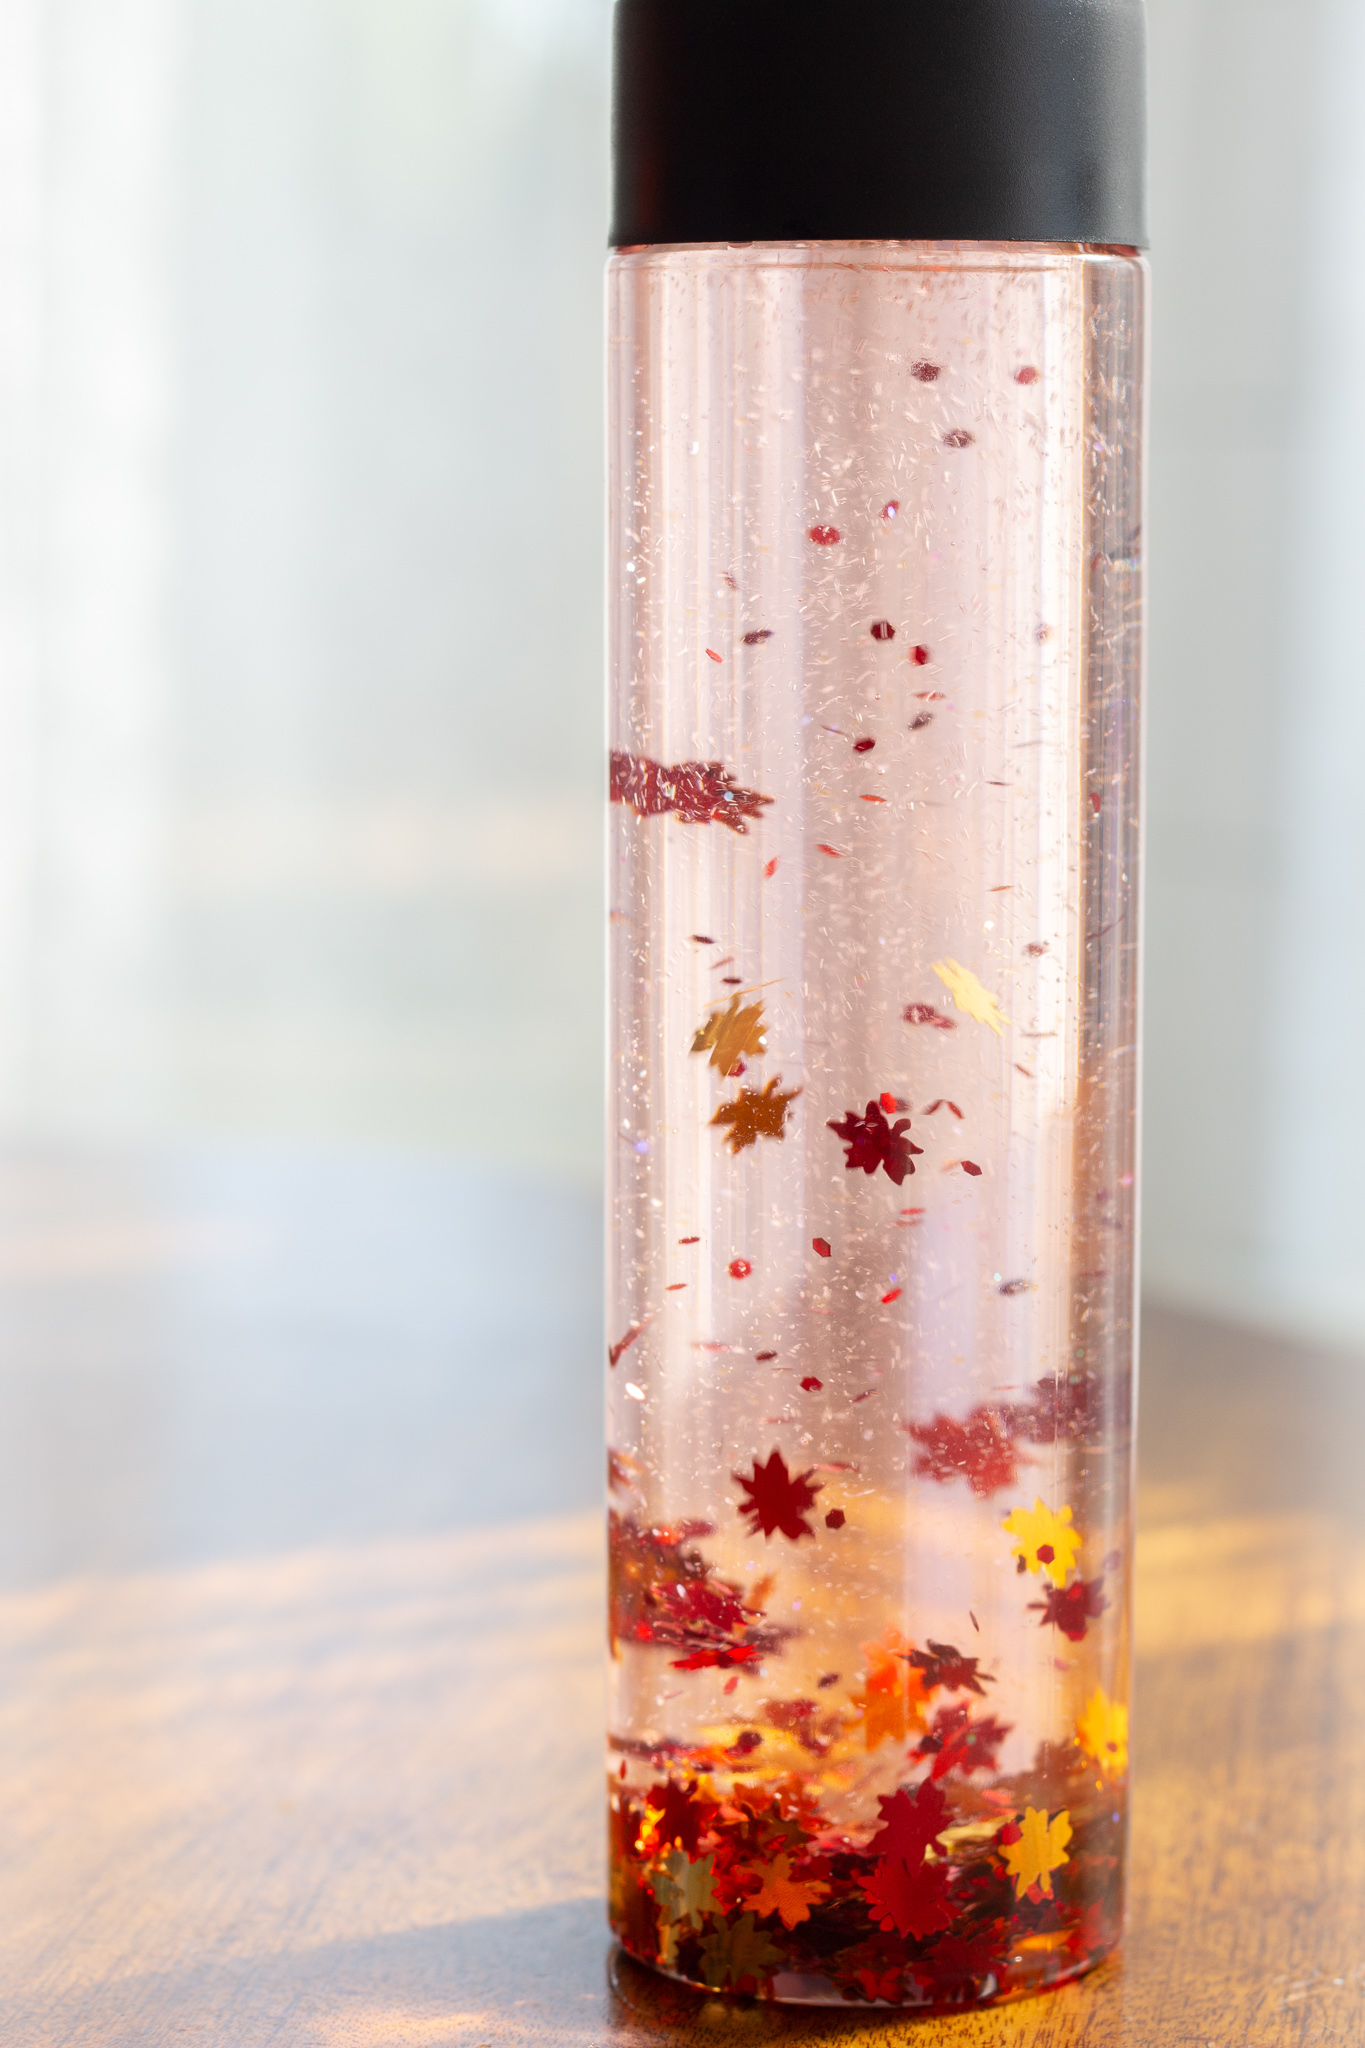
A more seasonal option… We used Leaf Shaped Confetti and lots of glitter, to mimic the magic of Autumn and the swirling falling leaves.
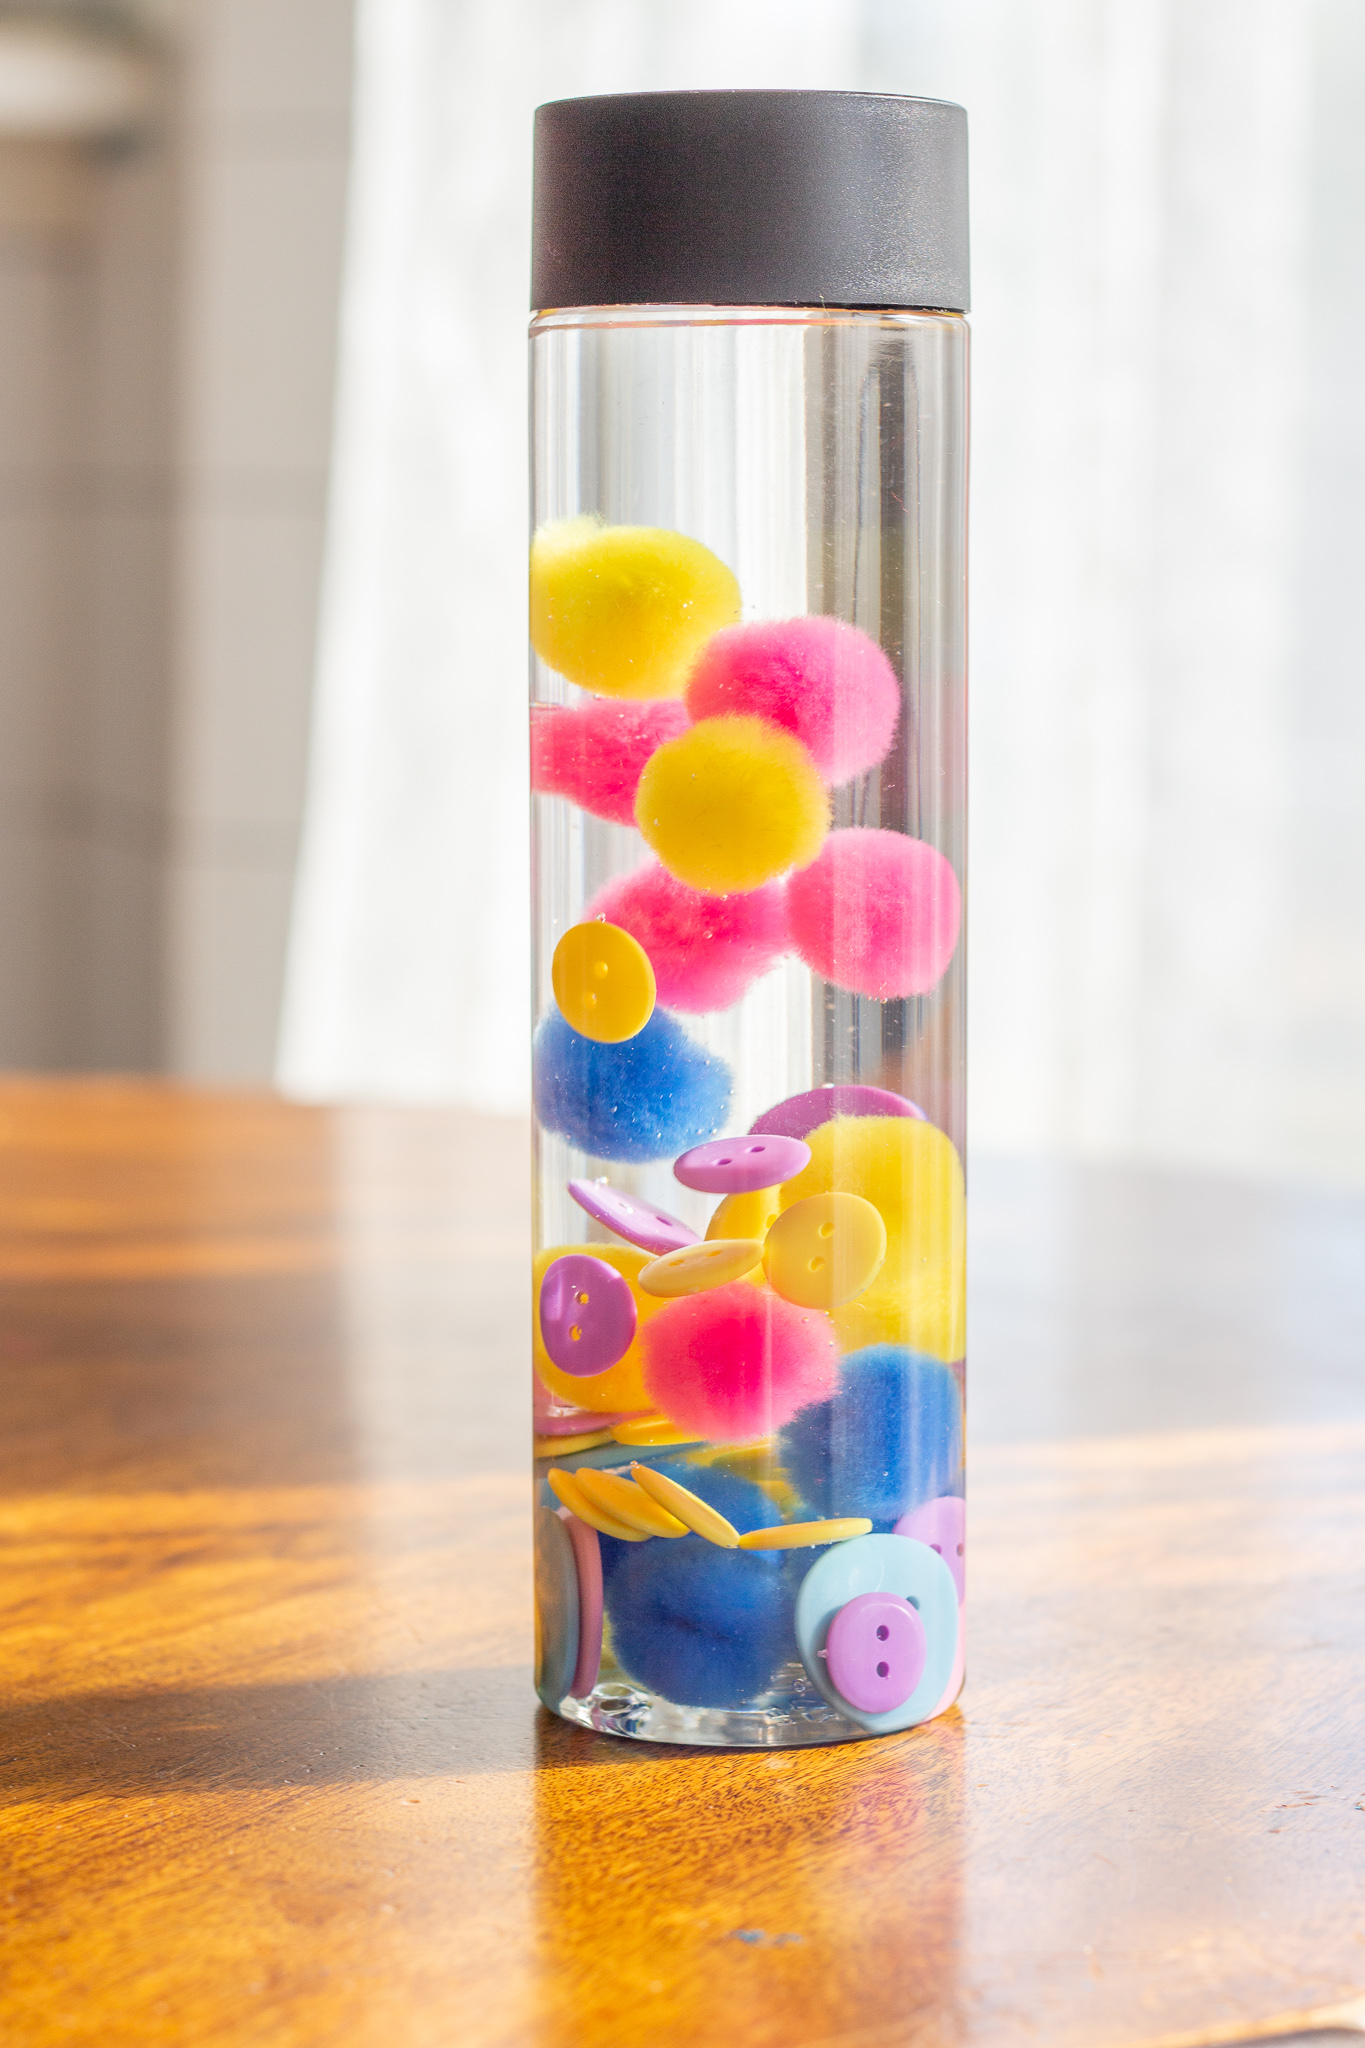
This whimsical one was easy and worked really well. I just threw some buttons and pom poms into some water. The pom poms had tiny air bubbles clinging to them and they often caused a traffic jam for the buttons. It was one of the favorites for sure!
So there you have it! Now you know the benefits of sensory bottles, you have some ideas on how to use them, and I’ve just scratched the surface of all the sensory bottles you can create!
Here’s to fun and preventing sensory meltdowns!!!
Julie is a frazzled mom of three tornadoes. As a dorky second-generation homeschooler, she writes about learning and play, natural living, special needs parenting and matters of the heart. She serves an astounding God that radically saved her. Follow My Mundane and Miraculous Life through social media!


![]()


[…] Glitter Wands or DIY Calm Down Bottles […]